| Version 65 (modified by sco, 5 years ago) (diff) |
|---|
Taking High Speed Bib Data for Image Quality Measurements
Part of the Image Quality Improvement Project at the Hobby Eberly Telescope will include the use of a high speed imaging camera to measure positions of star images.
The current plan is to use the Boresight Imaging Bundle camera (BIBcam) mounted on the IHMP. The BIBcam is a Manta_G-201B monochrome camera manufactured by Allied Vision The camera runs at 14.7 frames per second at full resolution but can run at higher frame rates with a smaller Region of Interest (ROI) or with binning. The BIBcam is an Ethernet device at the address 192.168.66.136. VimbaViewer is the software application that Allied Vision supplies to read their cameras.
Jump to the BIB Data Collection Procedure
Jump to the Accelerometer Data Collection Requirement
Jump to the Accelerometer Data Collection Procedure
Scope of the High Speed Camera Work
Hanshin Lee is the Principal Investigator of the project and he sent the following comments about the scope of the project on 2019-07-02
I am interested in data taken in different wind conditions, more specifically at different wind speed.
I am also interested in where the telescope is pointed with respect to where wind blows.
This can be a quite broad parameter space that we are exploring and the fact that this would require a special test set up with BIB makes the cadence of this test in a given month pretty low, hence likely to be a long term campaign, e.g. 6 month or longer.
The reason to go high speed is that this is the regime where we haven’t really looked closely (other than what Phillip started many years ago) and none of the current HET metrology instruments (WFSs/Guiders/ACAM) samples this time frequency. The data from the current HET metrology instruments is still unable to pin point the cause of the difference between HET delivered image quality and DIMM reported seeing. When looked at data from the past 3 years of HET operation, there is a trend in the image quality as a function of the wind speed. I am trying to understand the possibility of any part of the telescope system being excited by wind. The accelerometer data is a big part of this effort to provide an independent measurement of what the telescope structure is doing during these different wind conditions and how we can handle this accelerometer data may present a bigger problem than BIB data.
My proposed requirement is that,
- We perform this test as frequently as we can during engineering
period (or queue holes?) to build up enough statistical samples.
- This may present a conflict with CWFS/CCAS test but for now once a month for CWFS/CCAS would be sufficient.
- OWFS data can be used as a substitute for CWFS. So for BIB test, we can in principle run any trajectories that can feed bright star on BIB.
- BIB/CCAS test would also be a useful test to perform, but this may be too much constrained by the availability of bright BIB star tracks at that azimuth.
- So, I would prioritize, for now, 1) BIB/OWFS/GC, 2) CWFS/CCAS/OWFS/GC, 3) BIB/CCAS/OWFS/GC
- I would like to start with continuous 20msec exposure over a
duration of one minute as the baseline, and adjust it as we start
analyzing data.
- This will result in 3000 frames per set.
- I believe that the current BIB setting (1624x1234, Randy correct me if I am wrong on the full frame size) bins by 8x8 (hence 203x154).
- Each frame at 16bit/pix would be 62KB.
- Each set would be about 186MB.
- It is more critical to sample different conditions rather than
one single trajectory, but assuming that the condition changes
randomly over a track and considering test efficiency, perhaps
it makes sense to dedicate a complete track to this test.
- For say 30min-long track, I would have 5 ~ 10min interval between bursts.
- This would result in 3 to 6 sets per a track.
- Condition might not change within 30min period.
- In terms of storage, for the first couple tests, I would store all image frames and run post-analysis on them.
- Once the analysis procedure is established, I would like to have TO/RAs run the analysis script in between bursts and only store the post-processed output and delete the raw image frames.
- If this works well, we should maybe double the cadence of bursts per a track (~10 to 15 sets instead of 6) and we probably don’t need to worry too much about storage.
- But given this may be too much burden for RA/TOs doing this in the middle of a night, I am happy to download all frames and post process next day.
- This will result in 3000 frames per set.
- The BIB digitization should be set to 12 bits/pix rather than 8 bit/pix and save the frame as a 16bit image frame. (Randy, I am not sure whether Vimba viewer lets you do that).
- I am currently writing a small standalone program that streams and saves frames from AVT cameras (for other projects), but if Vimba viewer turns out to be inefficient, we can utilize this instead.
BIB Data Collection Procedure
Make sure the DIMM is running the whole time.
- Select a ~9th magnitude star (i.e., from the f9 catalog) and run shuffle on it with IFU=555 (the BIB). Choose a star which transits about 20 minutes from when you start the test. For good seeing use 9.5-9.9 and for bad seeing select 9.0-9.5.
target_setup -cat f9 5897 E -ifu 555 -to
- Get on this trajectory with "go_next". The TO will need to center the star on the BIB (will require opening the PFIP shutter and retracting the ACQ camera mirror), guide on the BIB, and handshake to a guider. Be sure that both guiders are storing images. Activate a wavefront sensor and allow it to stabilize.
- Once everything is stable and looks good, run this command to allow VimbaViewer to take control of the BIB:
syscmd -p 'BIB_RelinquishControl()'
- Start the VimbaViewer by running: vimbaviewer (aliased to /home/het/rbryant/Vimba/Vimba_2_1/Tools/Viewer/Bin/x86_64bit/VimbaViewer)
- The first window that starts up is the camera select window. Click the check box next to Manta_G201B(192.168.66.136).... Do not exit the Camera Select Window or the Camera Control Window (which pops up when you click the check box) will also exit.

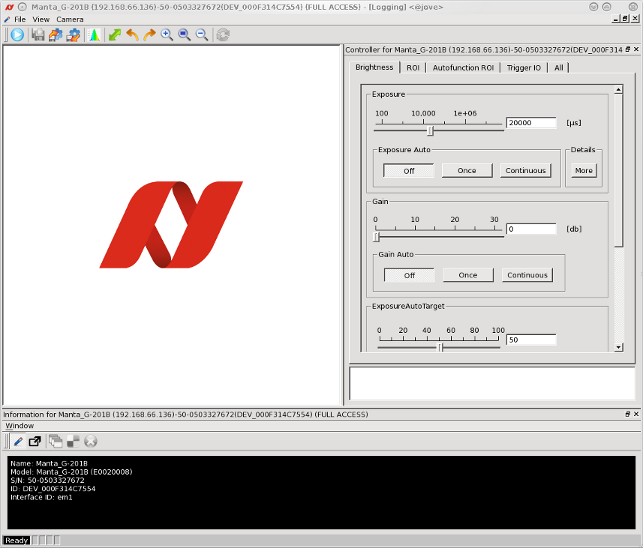
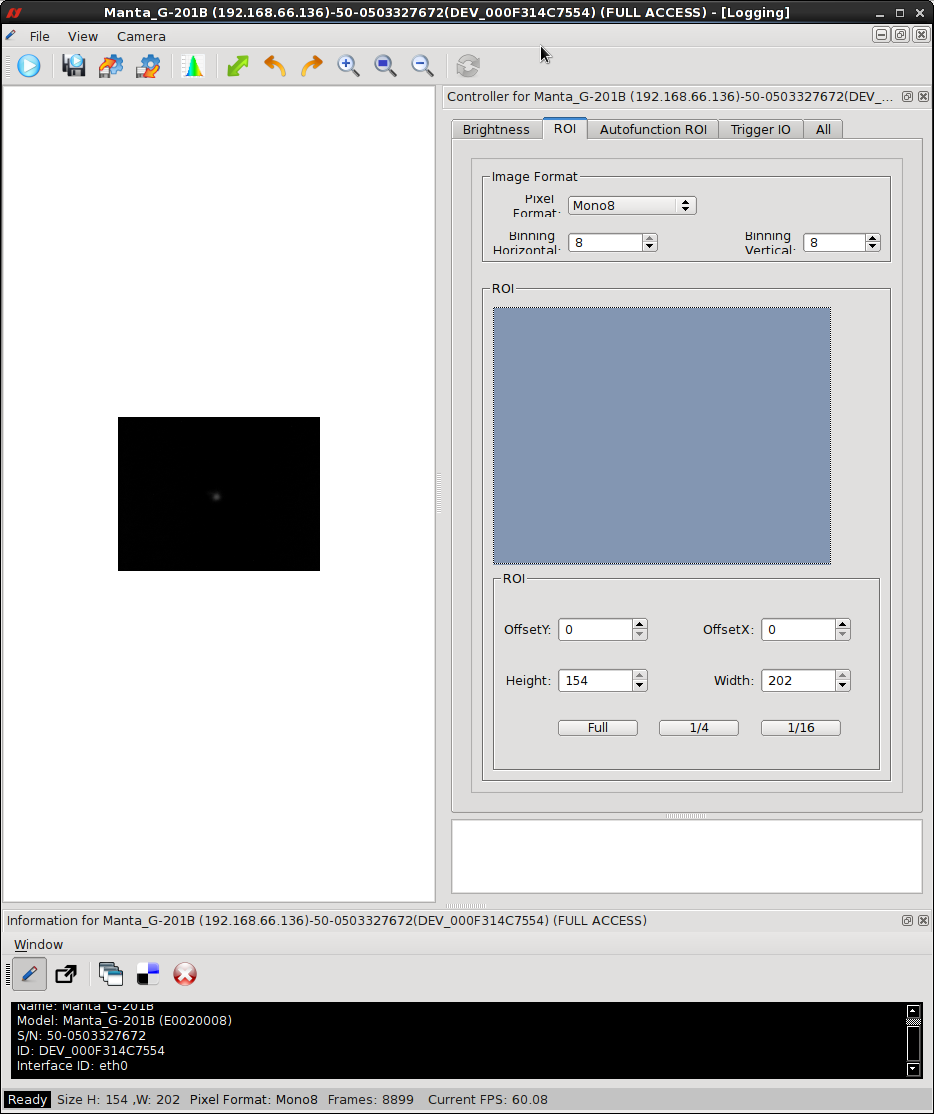
- The Camera Control Window will then come up:

- Set the exposure time to about 20,000 micro-seconds (that's what should produce the 50-60 FPS that Hanshin needs for this test).
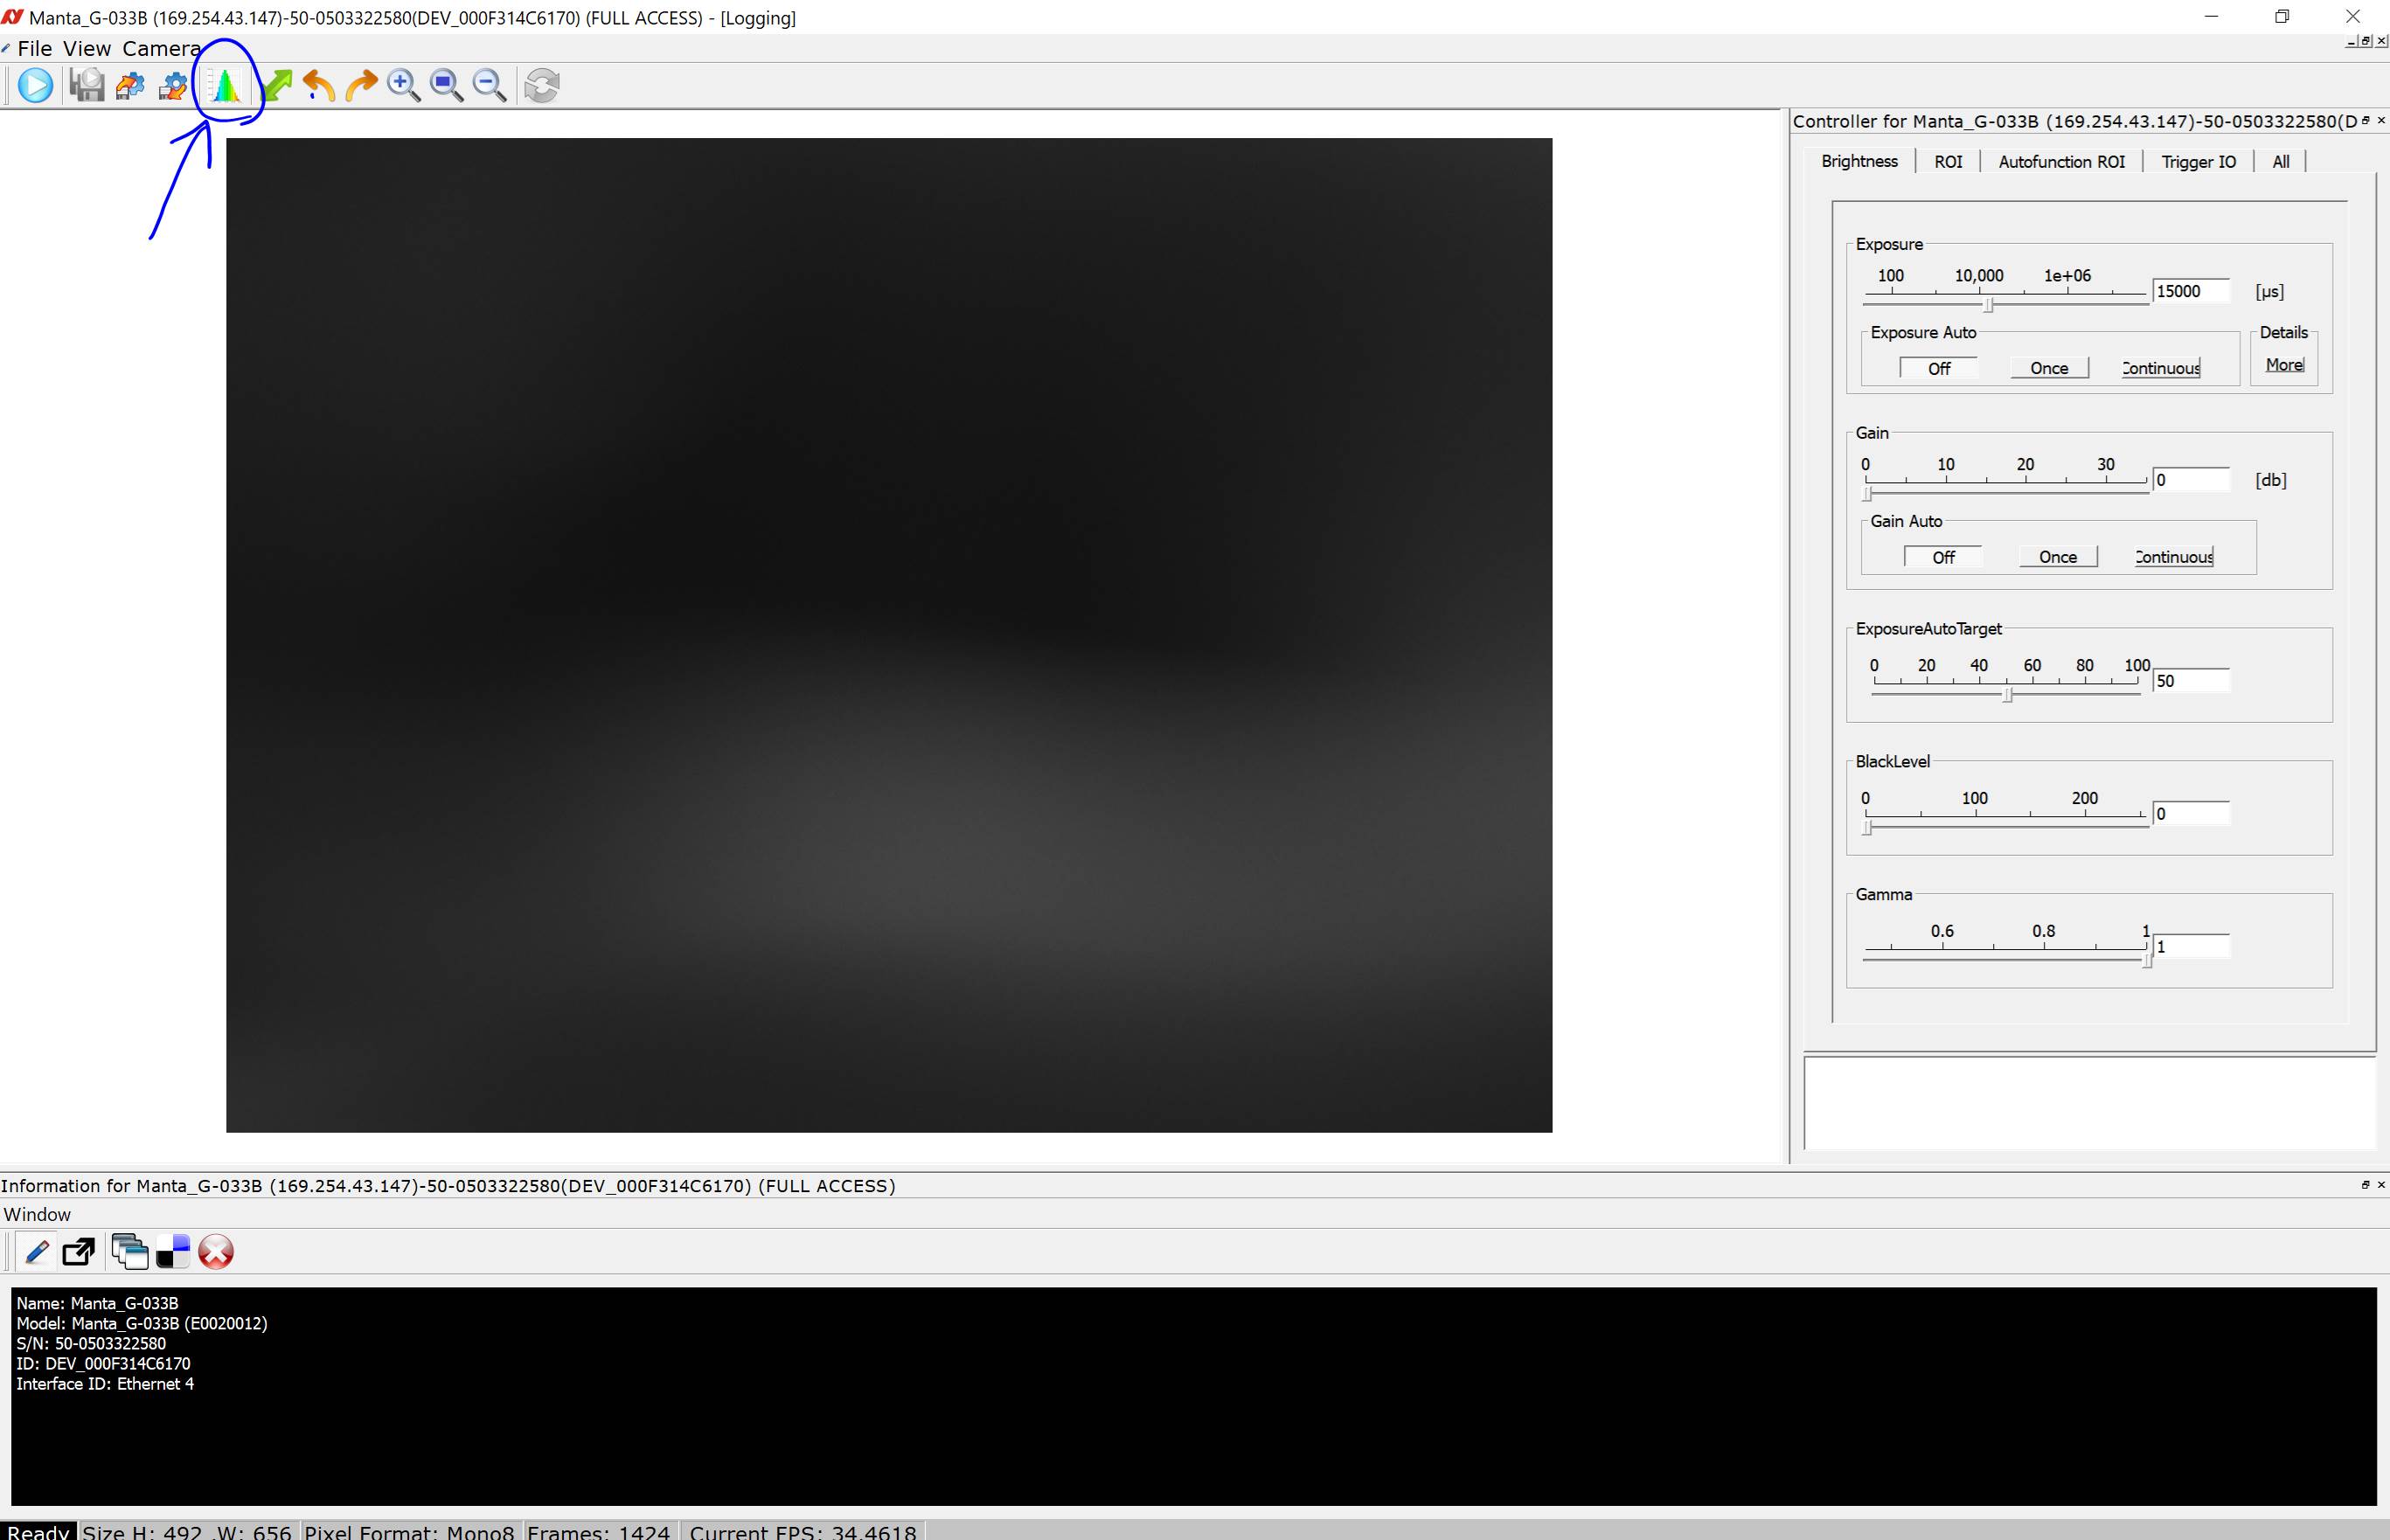
- Start displaying images by either clicking on the
 button, or typing Ctrl-F, or selecting the menu item Camera->Freerun. Make sure the star has at least 30 counts at its center (peak/max counts) and that the star is not saturating, and it should not be blown out at the center). DO NOT adjust the image scaling ("Gain"), keep it 0. As long as this looks good, continue with these steps. If star is too bright (saturating) or too faint (below 30 counts at its peak), you will need to reconsider your choice of star or the weather conditions.


You should check that the peak level in the star image is not above appoximately 200 adu (255 is the max, but the peak can vary from frame to frame). A tool that can be use for this is bibtool, which is set up to run on the (default) bmp format images from the vimbviewr gui. Here is an example of how we might view the image named 20191029_0910_9.bmp:
[astronomer@mcs Bib]$ biblook 20191029_0910_9 bmp N
The user places a circle marker around the star and enters a return . At that point the user is shown a 1-line table of values. The header indicates that the second number from the end of the line is the peak value. Here is an example:
# Contents of:  midodata.2
Col01 = X pixels (aperture X center)
Col02 = Y pixels (aperture Y center)
Col03 = X center, pixels (intensity weighted centroid)
Col04 = Y center, pixels (intensity weighted centroid)
Col05 = magnitude (assuming zp=30)
Col06 = Average value per pixel in aperture
Col07 = Average value per pixel in annulus
Col08 = number of pixels in aperture
Col09 = Peak pixel value (no bkg-sub, image ADU)
Col10 = marker code (1=circle,2=box,3=ellipse)
   106.04     79.07    106.62     78.27  21.475    91.238    87.188      635.0     204.33   1
You can answerr "N" to the next couple questions about cleaning files. It is the usual case that we delete all of the ASCII files made in this process since we are usually just measuring test images in preparation for taking the real data. In the above example we see that the peak level measured in our star image was 204 adu. This would be a safe level for taking high speed BIB images.
- If you are happy with this star, then set the parameters for an image series by selecting File->Image Series Options... from the File menu.


Format = .tiff
Name = YYYYMMDD_HHmm where YYYYMMDD_HHmm are year, month, day, hours, and minutes), ... for each image series that night
Destination Path = /hetdata/data/ImageQuality/YYYYmmdd/Bib
Number of Images = 3000
If you want to test your exposure level, set the number of images to 1 and take a set. You can directly view this image with ds9 -photo image.tiff. Alternatively, you could run biblook 20190906_0545_1 bmp N. Mark a circle around the star and hit a return. You will be told the peak. That number should be below 200adu if the Exposure value is set well. Still more alternatively, you could use convert to transform the image to a FITS format (convert 20190906_0545_1.bmp a.fits) and then ds9 a.fits to view the image any way you are comfortable with.
- Run this image series by clicking the
 button or select File->Save Image Series menu option. Taking 3000 images should take about 3 minutes. Make sure that the FPS is 50-60 (adjust exposure time if needed - frames/second is the most important part).

- Wait 2 minutes and repeat steps 9 and 10 until you have taken a total of 5-6 sets of images (each with their YYYMMDD_HHmm time stamp name).
- Create a text file:
/hetdata/data/ImageQuality/YYYYmmdd/Bib/YYYYmmdd_data.txt
and record the start/stop time of each set. Also record the wind speed, wind direction, telescope azimuth, louvre state, and the camera data rate (FPS) as shown at the bottom of the camera control window
.

- When these sets are completed, you can cancel the trajectory and move on your night. To return the BIB to its normal state, click the "X"s in the top right corner of the Camera Control Window and the Camera Select Window. Then give control of the BIB back to PAS/PFIP with:
syscmd -p 'BIB_TakeControl()'
- Email Hanshin ( lee@… ) to let him know that you have done this test.
Other notes and FYIs that may be helpful (from an earlier version of this procedure):
The environment is set up to use the Vimba libraries. If you need to redo that, you can use the following command if you are using csh (guider/astronomer use csh)
setenv GENICAM_GENTL64_PATH :/home/het/rbryant/Vimba/Vimba_2_1/VimbaGigETL/CTI/x86_64bit or this one, if you are running in a Bash shell export GENICAM_GENTL64_PATH=:/home/het/rbryant/Vimba/Vimba_2_1/VimbaGigETL/CTI/x86_64bit These lines have been added to the guider and astronomer .cshrc files.
The pasServer and the pfipServer need to be running in order to open the pfip shutter
but the BIBcam needs to be disconnected from the pasServer so that the VimbaViewer can take control of the camera. To disconnect the BIBcam from the pasServer, run the following shell command. If you don't do this, the VimbaViewer will come up in 'Read Only' mode
syscmd -p 'BIB_RelinquishControl()'
Use the following to regain control in pfip. Note, that you must close the VimbaViewer before the PAS can retake control.
syscmd -p 'BIB_TakeControl()'
The other cameras that may be listed in the Camera Select Window are,
- the PVCam Manta G-046(192.168.66.134),
- the TTCam GC665M(192.168.66.138),
- the CWFScam Manta_G-201B(192.168.66.135),
- the HPFACQcam Manta_v-223B-NIR(192.168.66.145).
No settings files are immediately obvious, but if anyone wants to add them, this was the original instruction: Load the settings file from ????.xml (anyone want to define this path?) by clicking the  button or by selecting the menu item Camera->Load Camera Settings
Accelerometer Requirements
From Hanshin 2019-07-03
My requirement for the accelerometer measurement is
Sample at 50Hz
This should cut down the per-night file size to ~ a few 100MB level or less.
Since the accelerometer does not have a way to let us set to 50Hz, we can down sample the raw data (taken at 1kHz) to 50Hz in a post-processing.
Since we need (timestamp,xg,yg,zg) in 32bit float per sample, over 8 hour duration at 50Hz, the essential information could be contained in a binary file as small as 23MB per night (~700MB per month), which sounds not too bad to me.
Sampling resolution of accelerometers on VIRUS enclosure
In one of my previous email, I looked at the expected acceleration for the given amount of “telescope structure” motion that corresponds to 1 ~ 1.5 arcsec FWHM in image quality at 3 ~ 5Hz time frequency.
This predicts roughly 0.002g acceleration. Since the accelerometer can measure down to 0.0001g, this seems like something we should be able to measure easily.
For VIRUS enclosures to transmit power to the telescope structure, I imagine its acceleration would have to be larger, but if it goes over +/-1.5g (the dynamic range of the accelerometer), then that seems pretty extreme.
So, my suggestion is to stick the current accelerometer to one of the enclosure and excite it by a person and see if the acceleration would go over the limit. If it does, then I suppose we need to think about getting alternative accelerometer.
It is hard to imagine however that the enclosure would accelerate over 1.5g. It is not like it is sitting outside without any stiff structures.
Regarding when to take data
It is possible that we pick and choose conditions when we take the data, e.g. depending on when image quality looks good or bad. But I would like that kind of third party judgement to be excluded from the data. Ideally, I would like to take the data whenever the telescope dome is open and we are observing.
Accelerometer Data Collection Procedure
- On the Windows 7 laptop, open the CXRecorder by double clicking on the desktop icon

- the CXRecorder window should appear
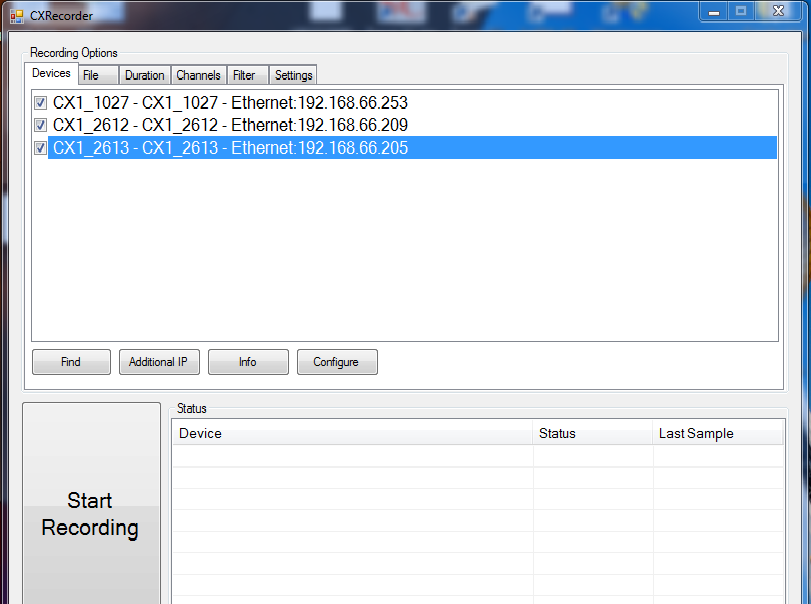
- Select the CX1_1027-CX1_1027 - Ethernet: 192.168.66.253 device by clicking in the check box.
- Verify the following settings
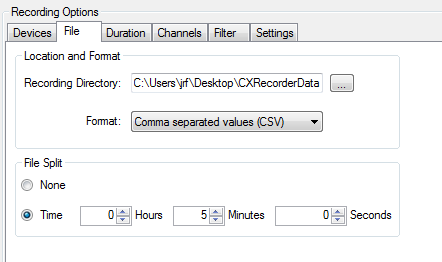
- on the File tab, set the directory, format, and split time
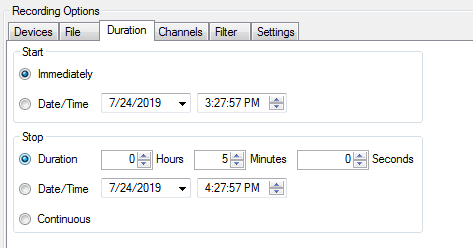
- on the Duration tab, start immediately, stop duration 5 minutes
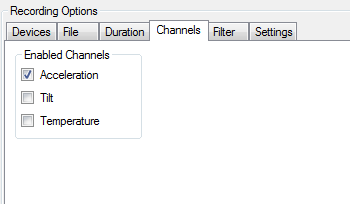
- on the Channels tab, disable Tilt, Temperature, and enable Acceleration
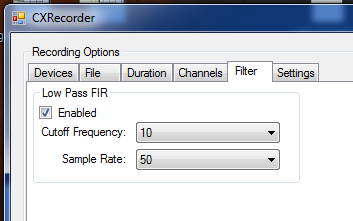
- on the Filter table, select Enabled, cutoff frequency 10, Sample Rate 50
- on the File tab, set the directory, format, and split time
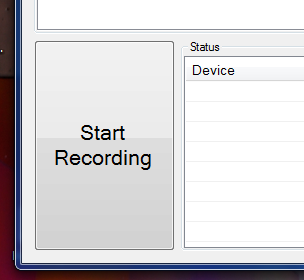
- Click on Start Recording
- Let Jim know the next morning that there are data to package up for Hanshin. We may write directory to '/hetdata/data/ImageQuality/YYYYmmdd/CX1' later in the project.


Attachments (16)
-
VimbaViewer_BIB.png
(84.7 KB) -
added by admin 5 years ago.
Vimba Camera Select window
-
VimbaViewer_Main.png
(31.9 KB) -
added by admin 5 years ago.
Vimba Camera Window
- VimbaViewer_Image.png (1.4 KB) - added by admin 5 years ago.
- VimbaViewer_Freerun.png (1.4 KB) - added by admin 5 years ago.
- VimbaViewer_fps.png (774 bytes) - added by admin 5 years ago.
- VimbaViewer_Load.png (1.3 KB) - added by admin 5 years ago.
- CX1_channels.png (4.6 KB) - added by admin 5 years ago.
- CX1_duration.png (9.3 KB) - added by admin 5 years ago.
- CX1_file.png (8.6 KB) - added by admin 5 years ago.
- CX1_recording.png (16.0 KB) - added by admin 5 years ago.
- CX1_icon.png (12.6 KB) - added by admin 5 years ago.
- CX1_window.png (76.6 KB) - added by admin 5 years ago.
- CX1_filter.png (24.1 KB) - added by admin 5 years ago.
- VimbaViewer_Save.png (17.8 KB) - added by admin 5 years ago.
-
image001.jpg
(240.1 KB) -
added by shetrone 5 years ago.
histogram
- ROI_tab.png (87.5 KB) - added by stevenj 4 years ago.
Download all attachments as: .zip