| Version 21 (modified by stevenj, 4 years ago) (diff) |
|---|
DIMM Procedures
Start of the Night
If the telescope has been shutdown properly setup can be very fast:
- Unlock and open the door (using patented knee-assist method)
- Press and release roof open button
- Press and hold louvre open button until a breeze is felt
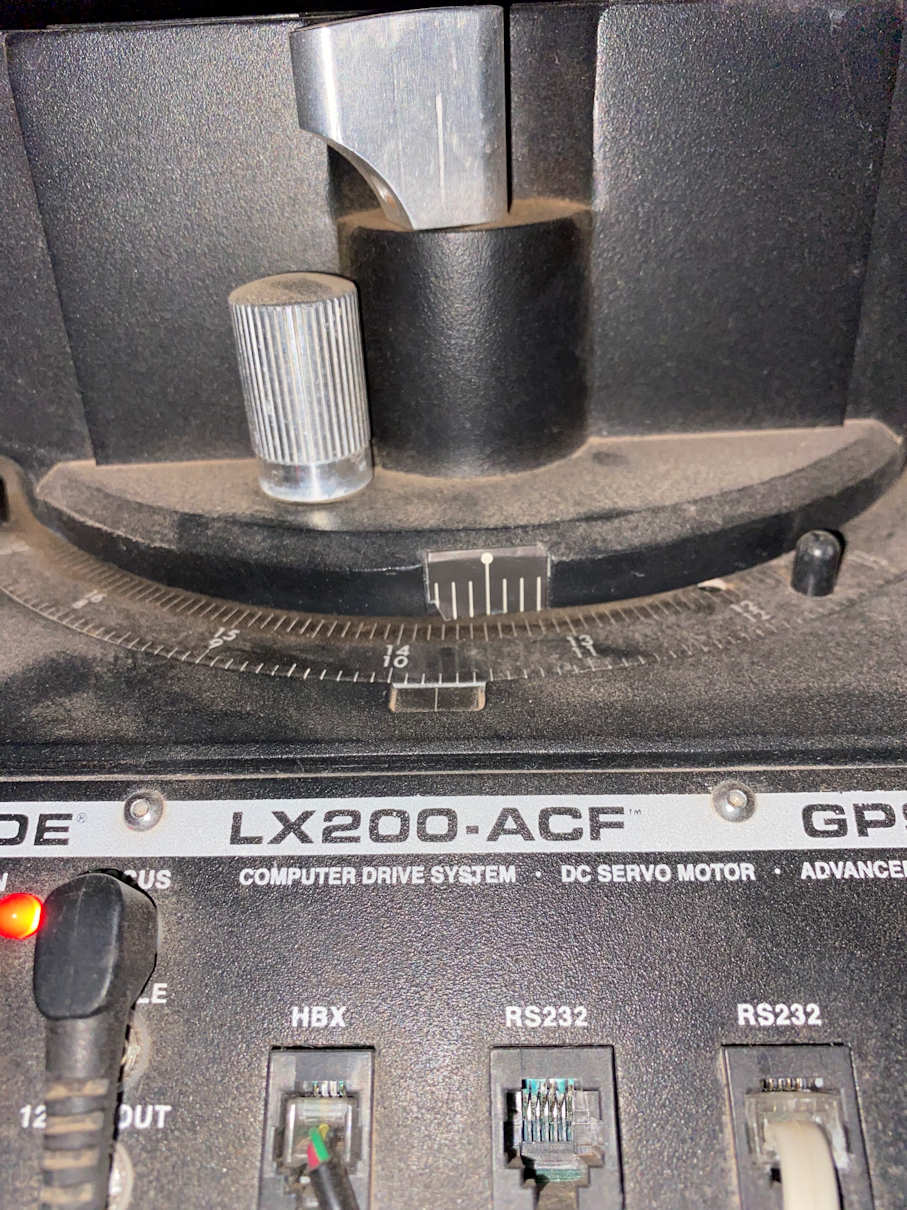
- Turn on power to the Telescope on the base panel of scope
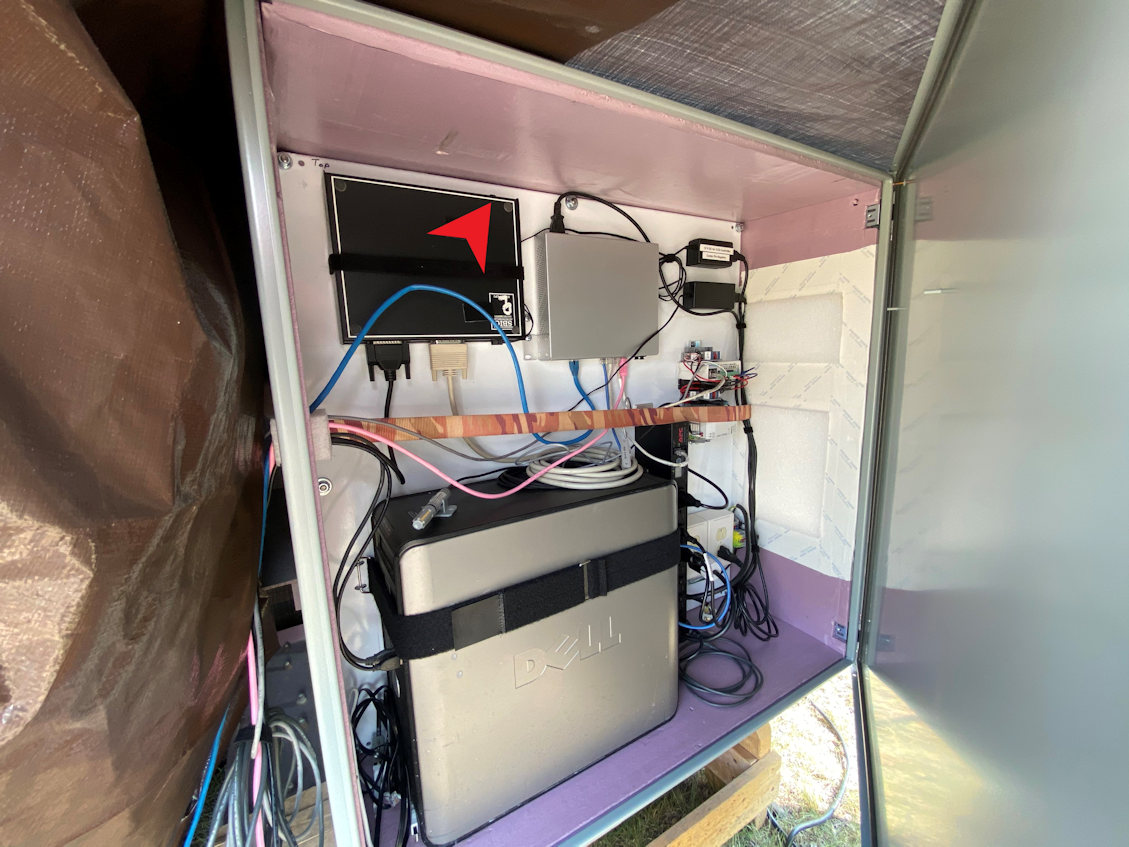
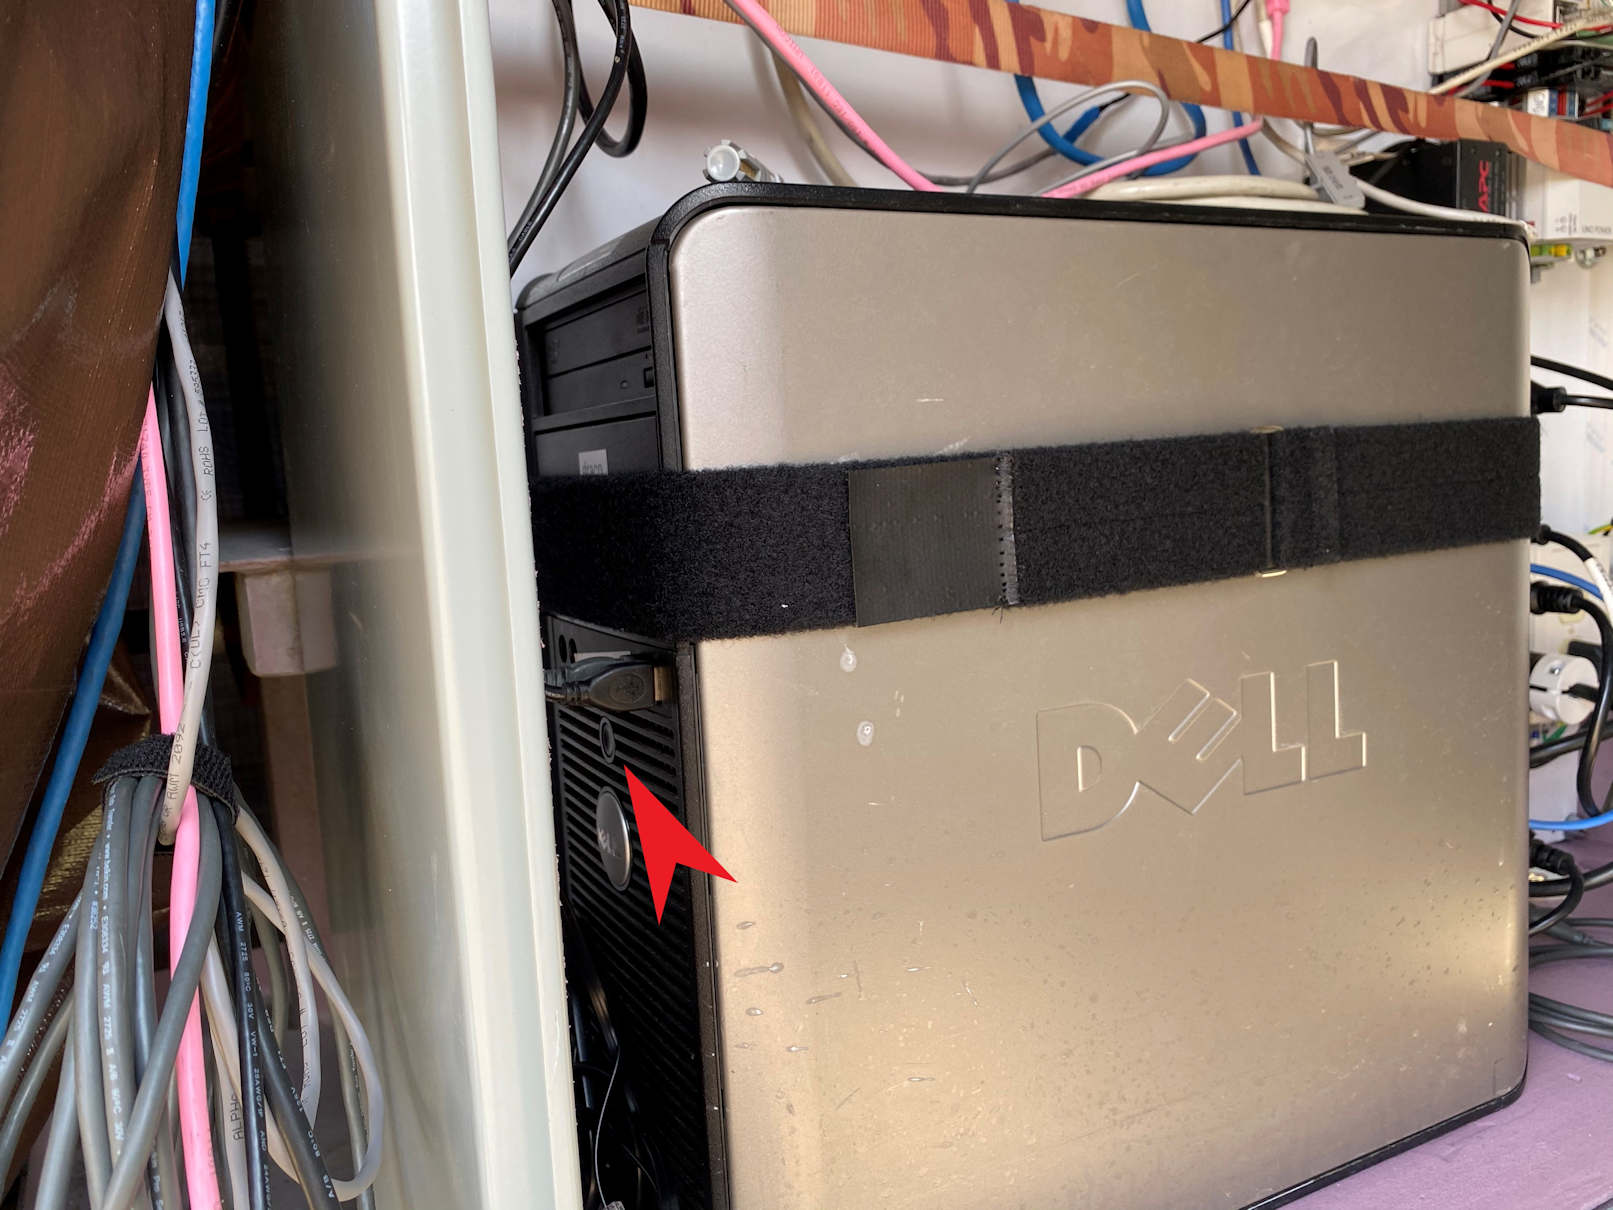
- Turn on power to the CCD which is on the far side of the enclosure as a small black box
- Open the keyboard tray and turn on the computer monitor using the small fob next to the keyboard (might need to move mouse to wake it up)
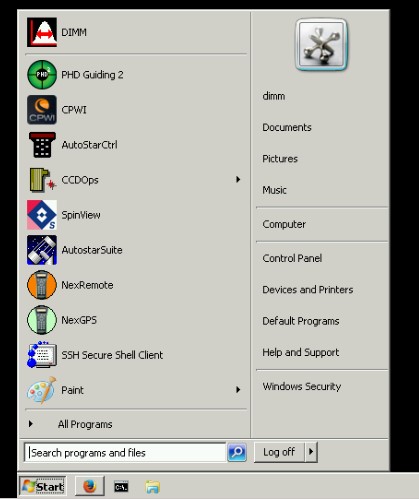
- Select DIMM login and enter DIMM password (on post-it note under keyboard)
- Click the time and date on the computer in the lower right corner
- Using the telescope hand-paddle hit Enter to choose "no" Daylight savings time
- Using the hand paddle enter the computer time and then hit enter (be sure that you select AM or PM appropriately)
- Using the hand paddle enter the computer date
- Start the DIMM software on the computer by clicking on the DIMM icon on the Desktop. This will start the CCD cooling
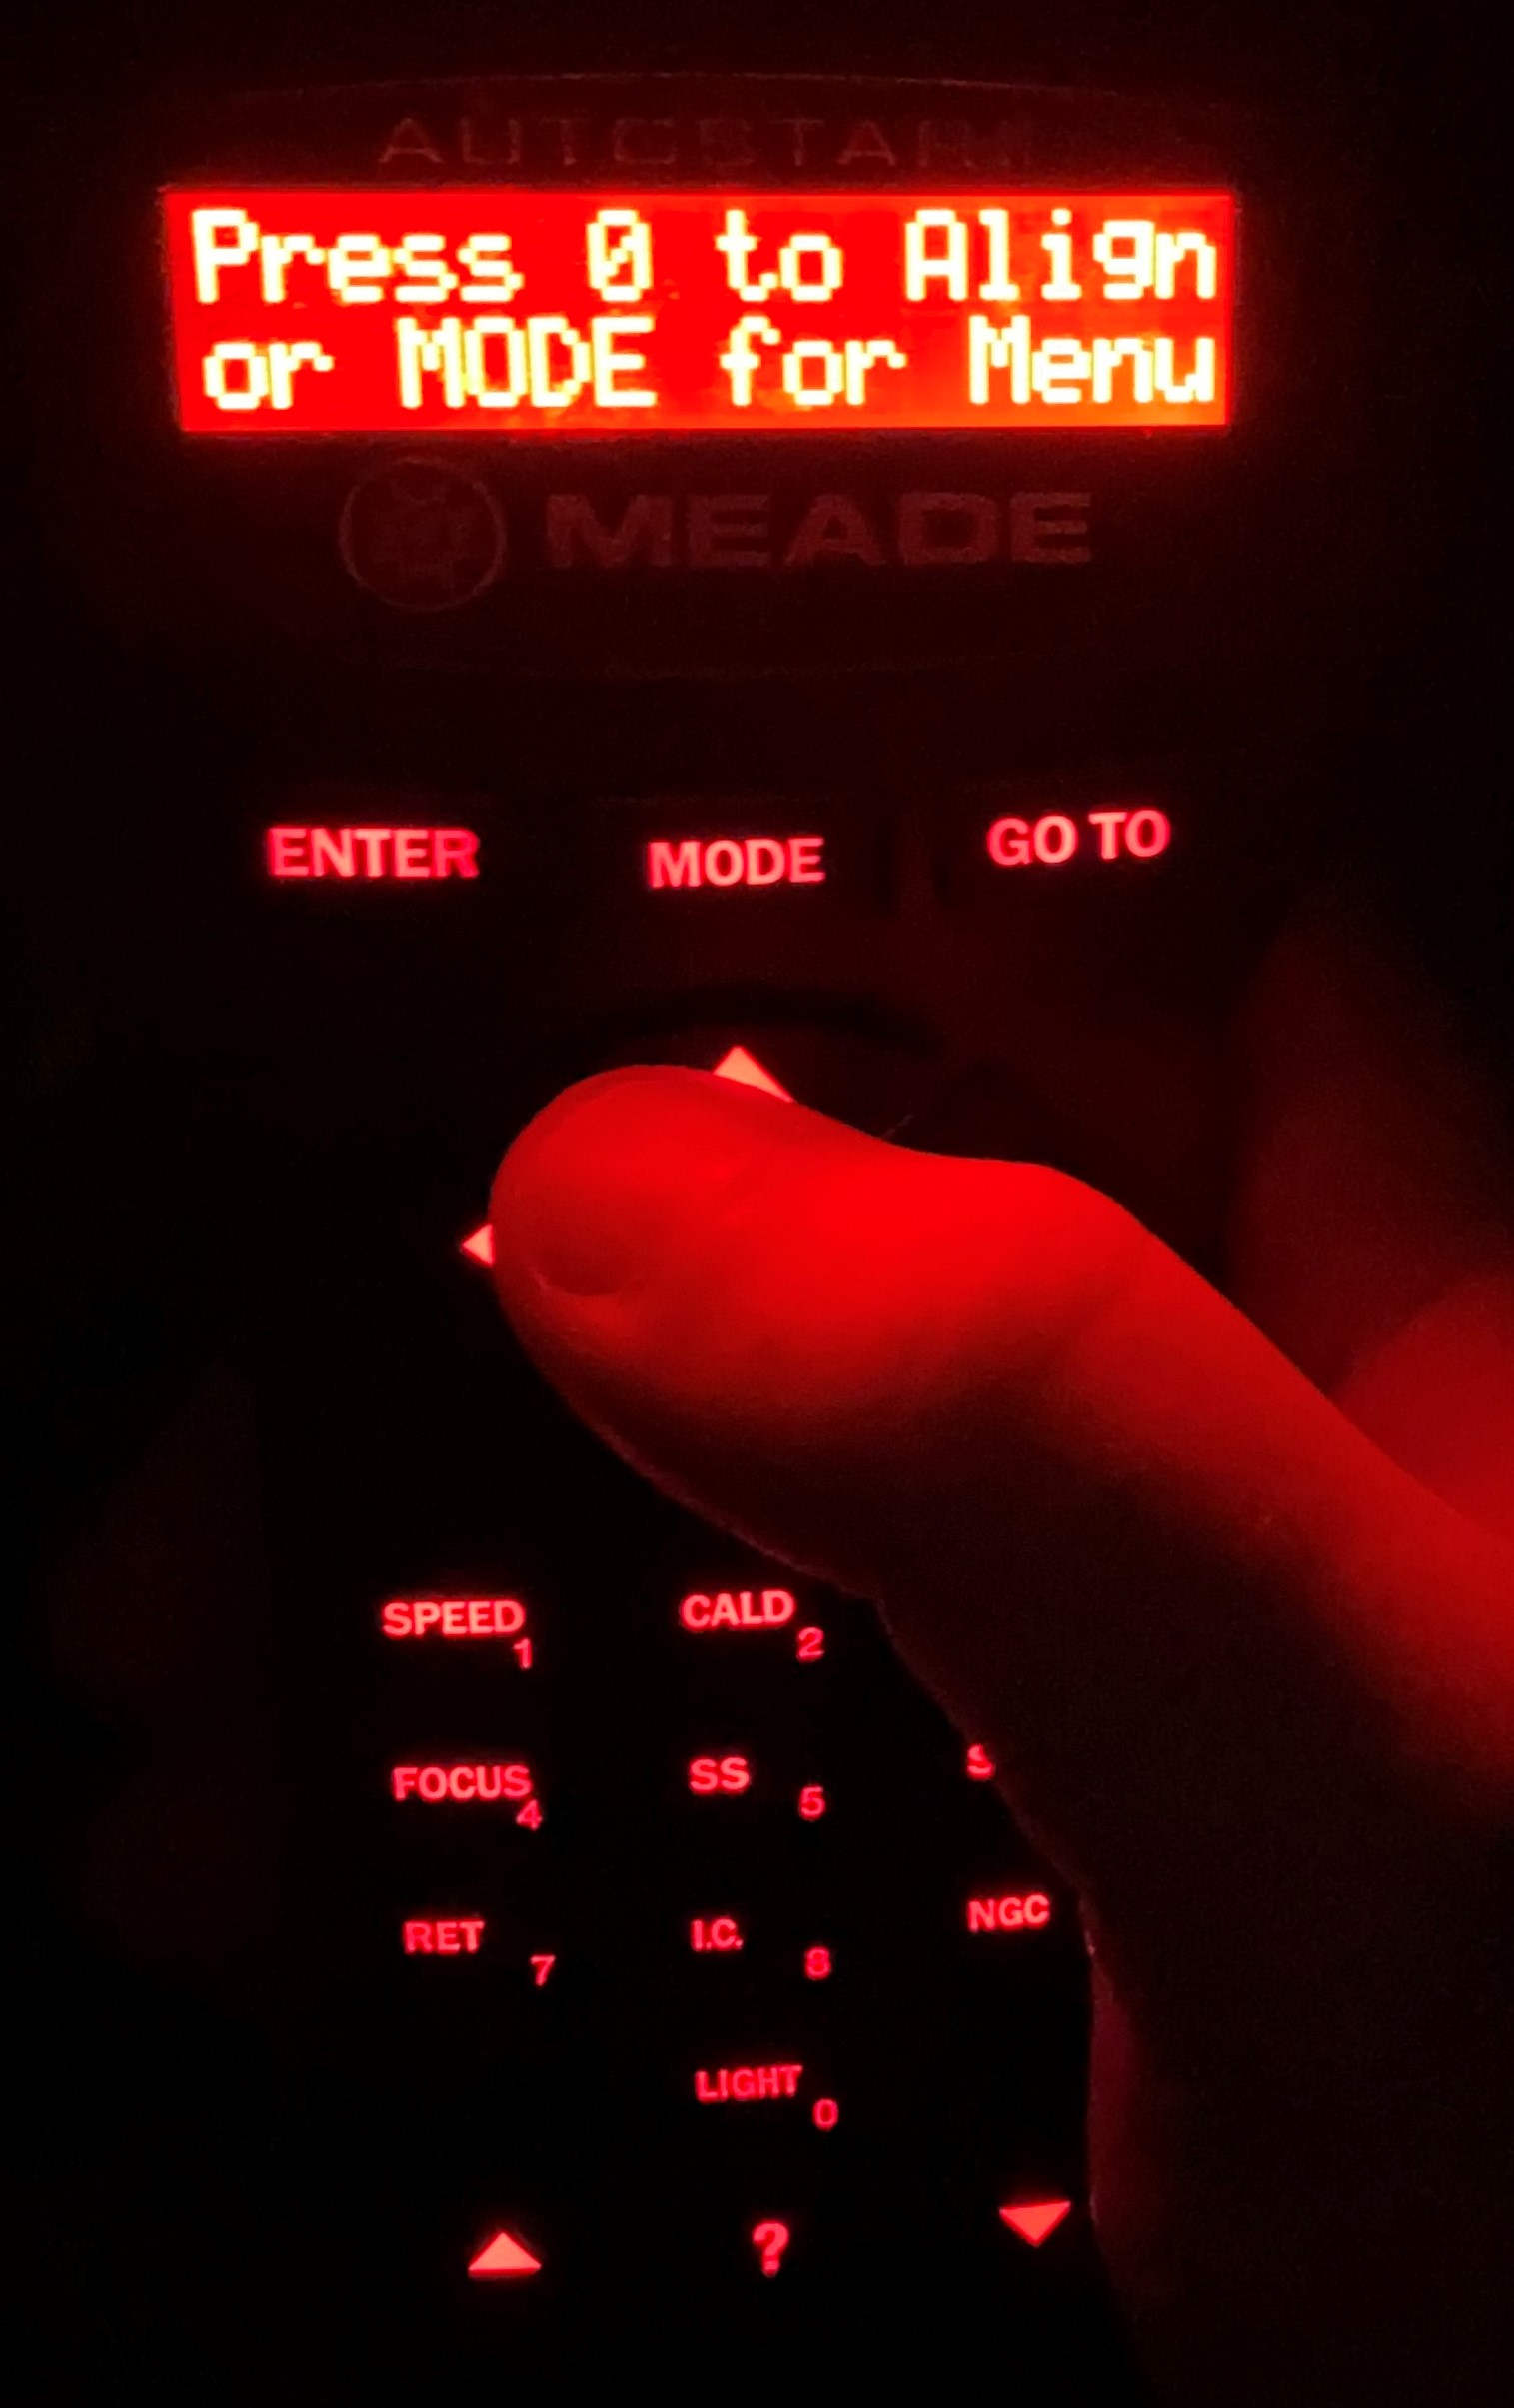
- Using the hand paddle, press "mode" to get to the "Object" menu and then press Enter
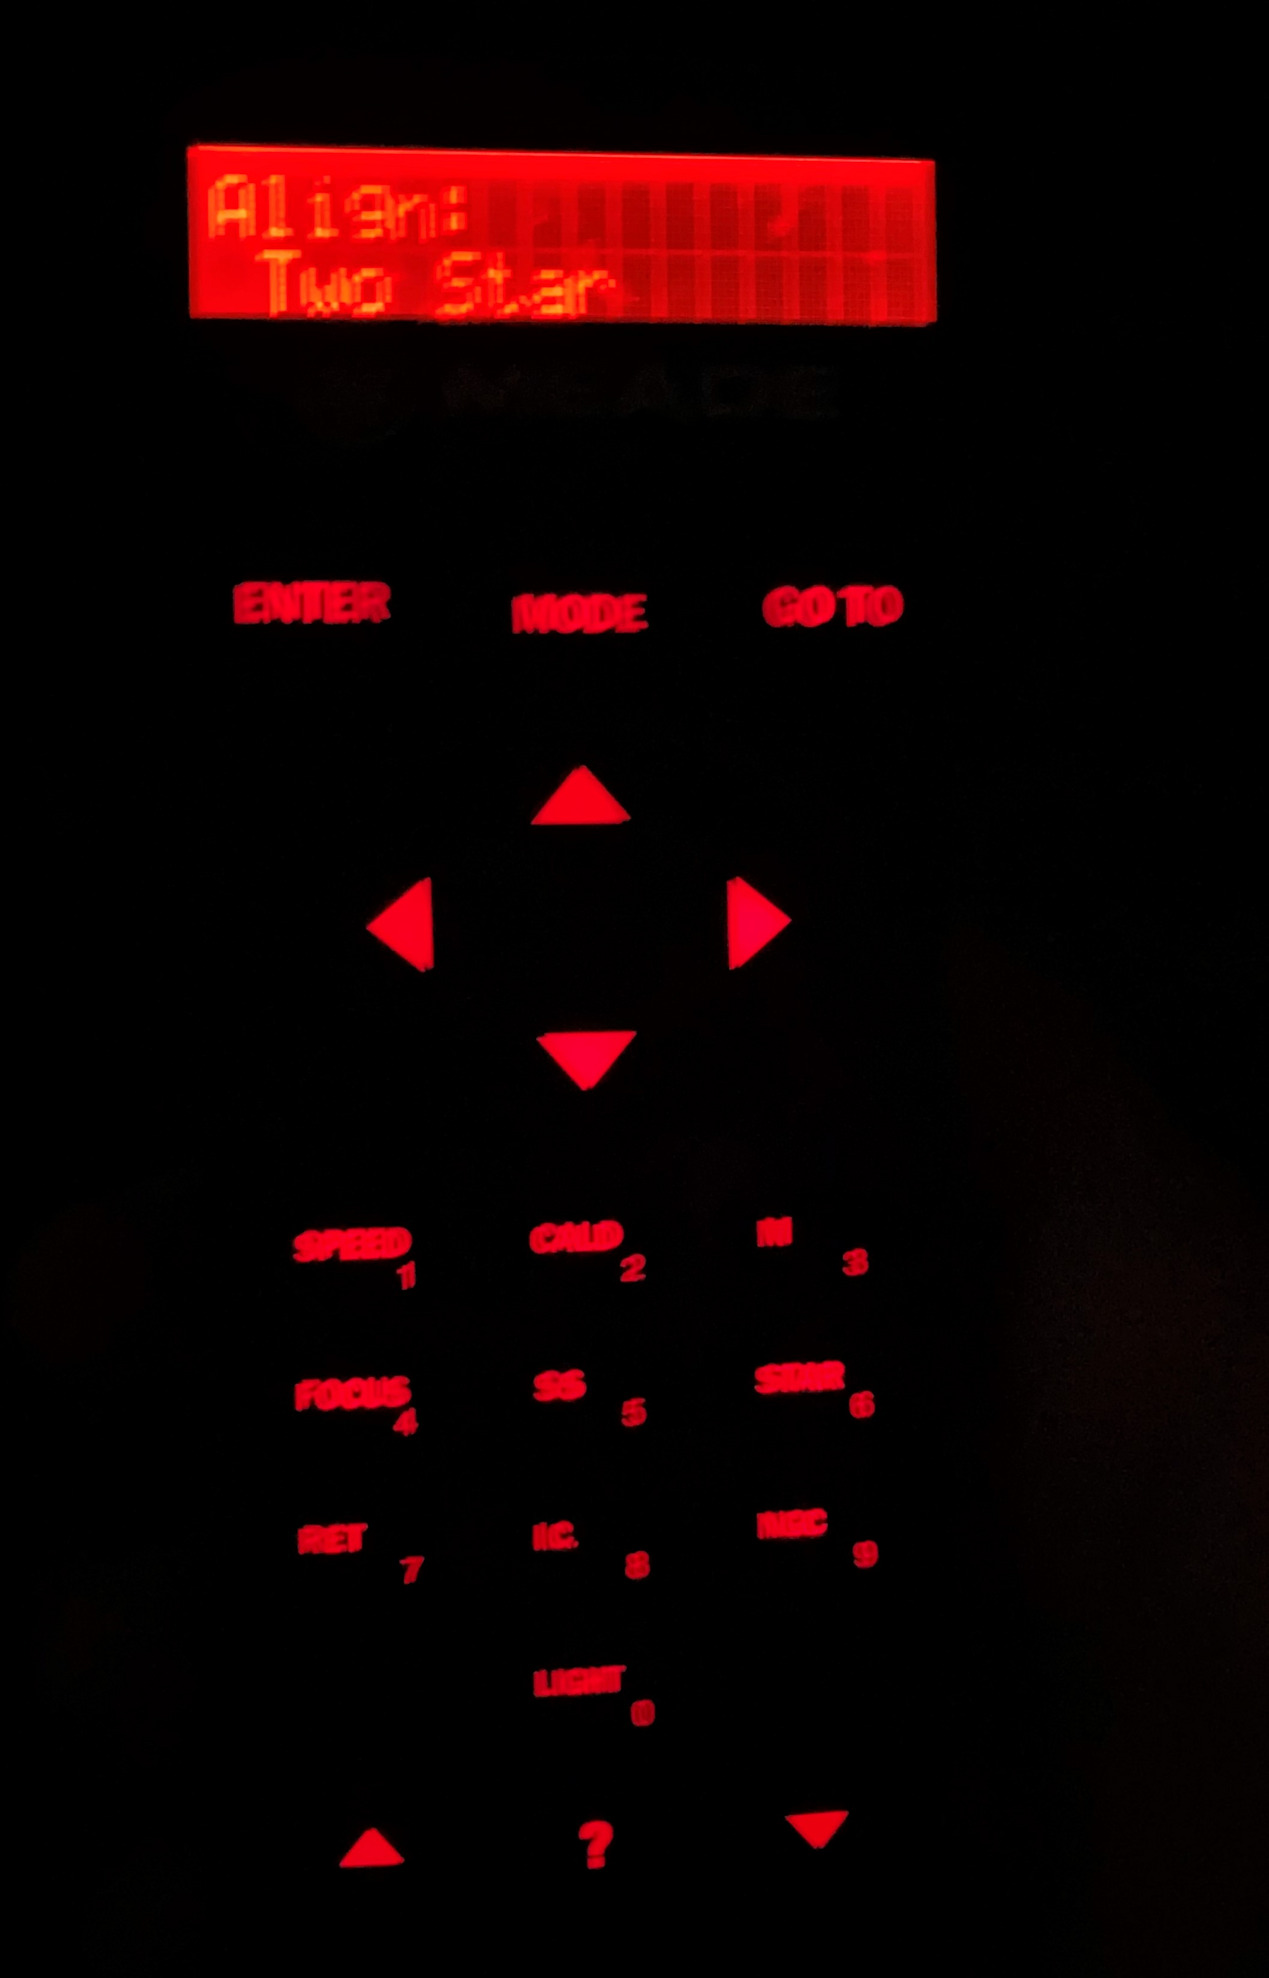
- use the arrows at the bottom of the hand paddle to select "Star" and then press Enter
- use the arrows at the bottom of the hand paddle to select "Named" and press Enter
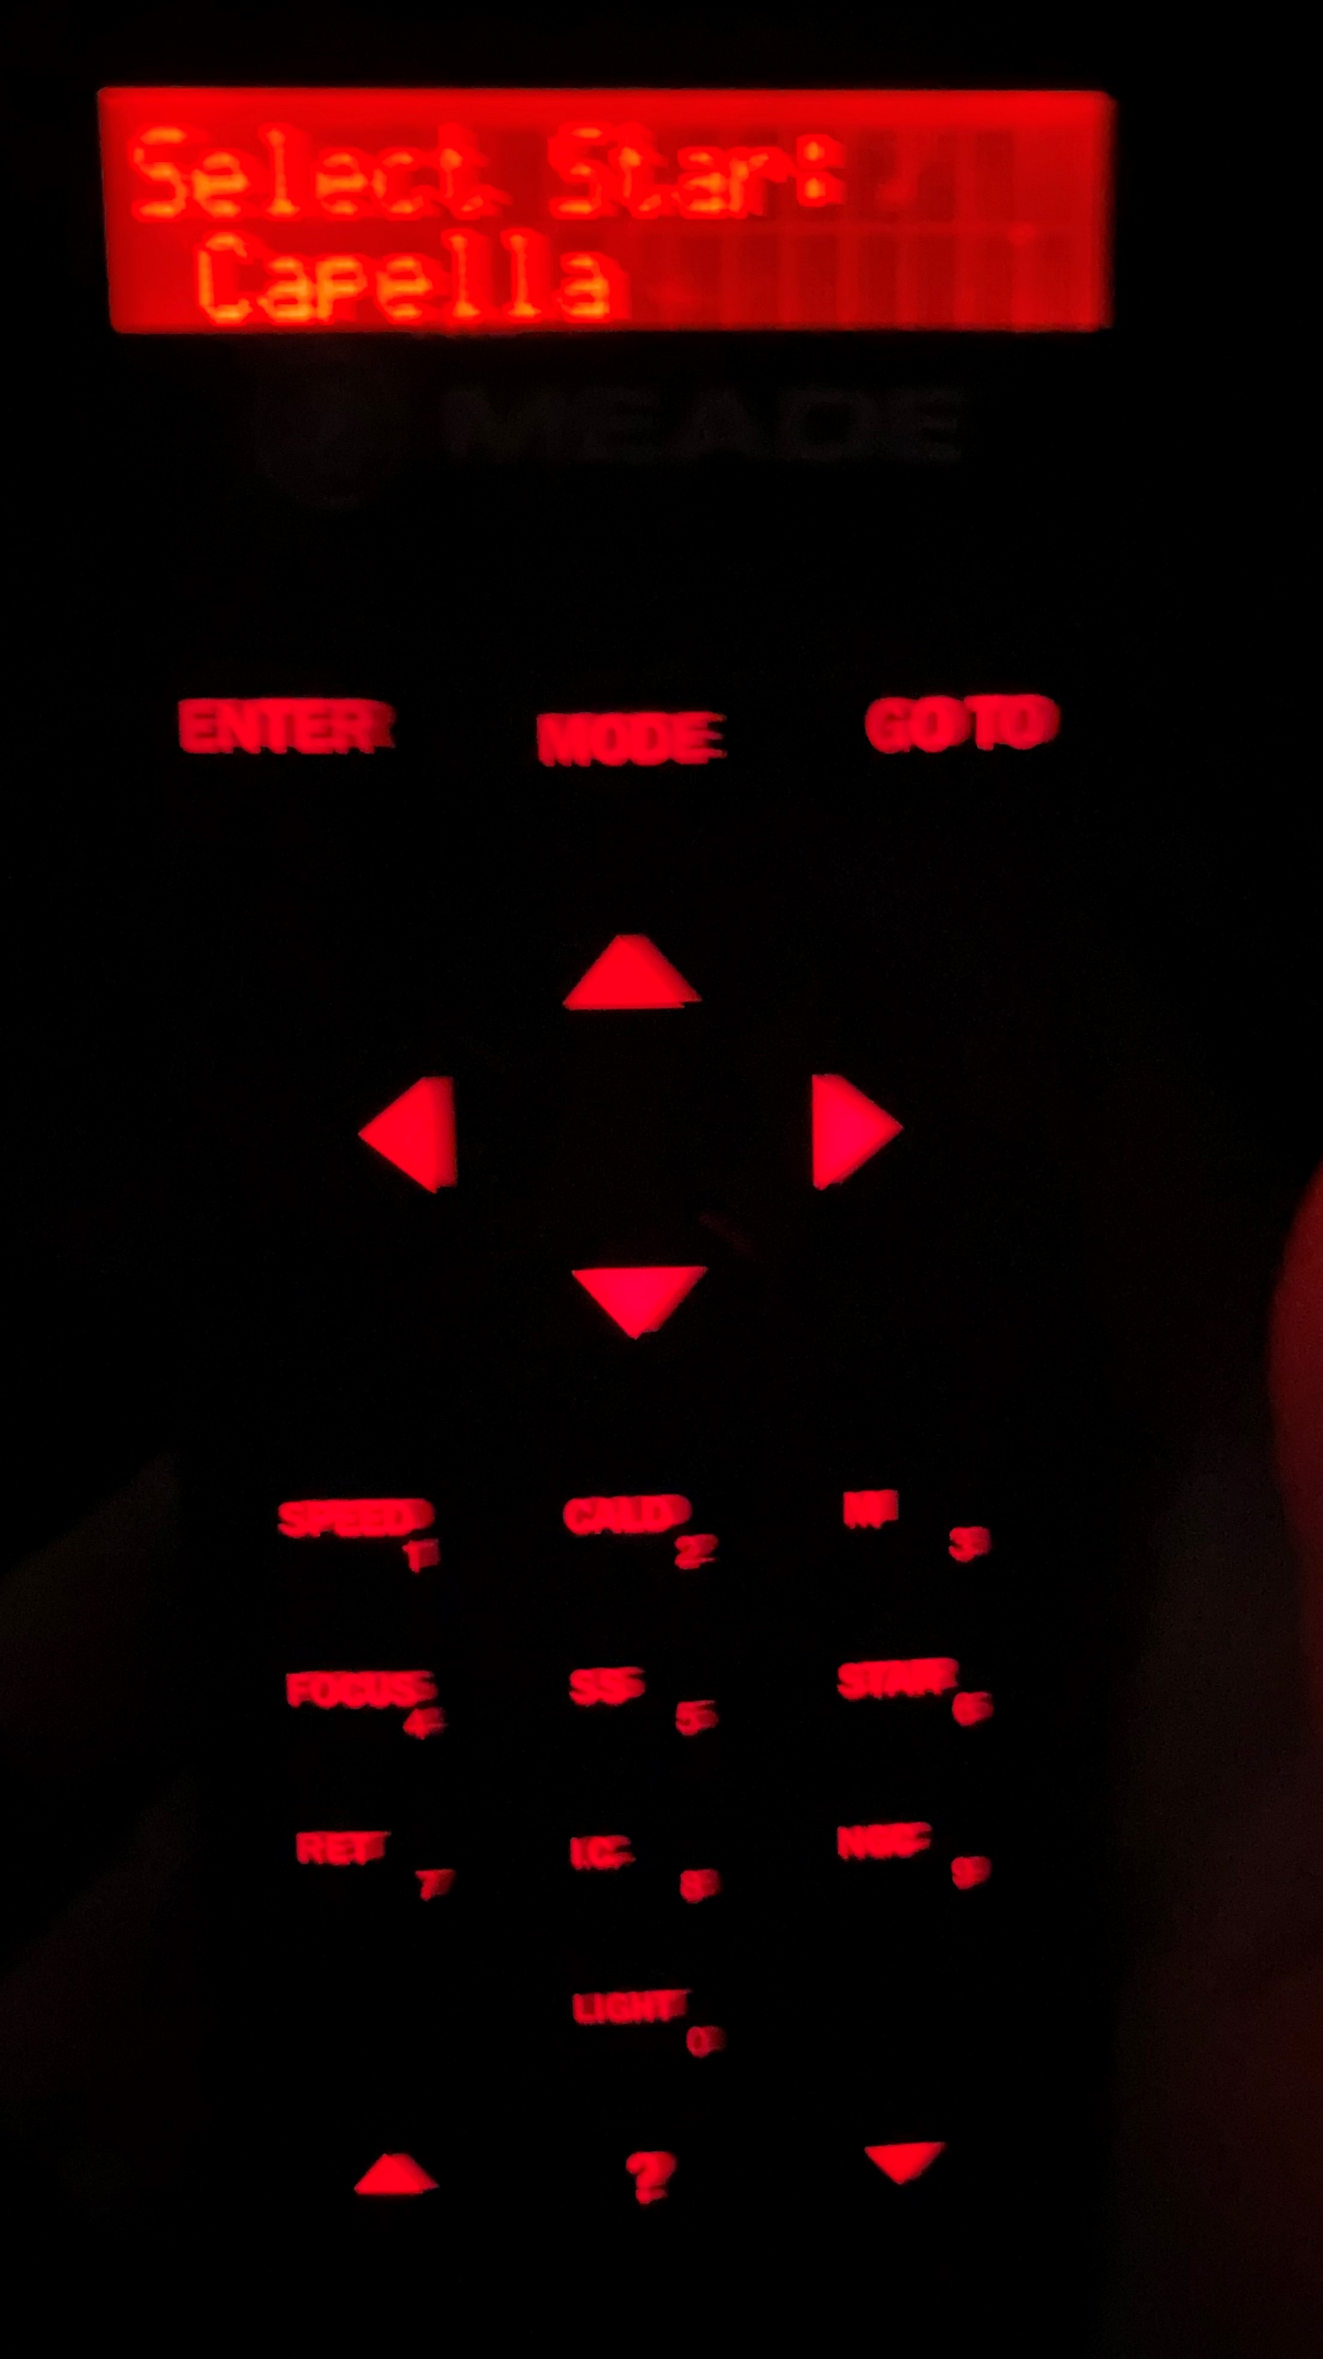
- use the arrows at the bottom of the hand paddle to find the star of interest (e.g., Deneb) and press Enter
- Note always select stars that will stay north of the Zenith.
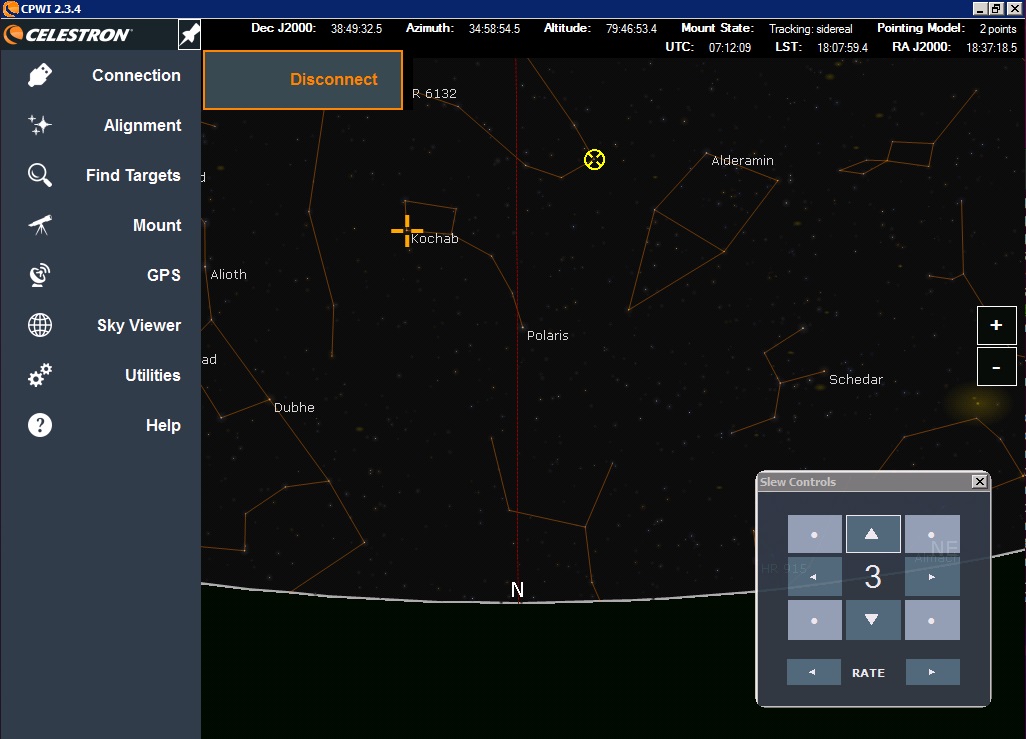
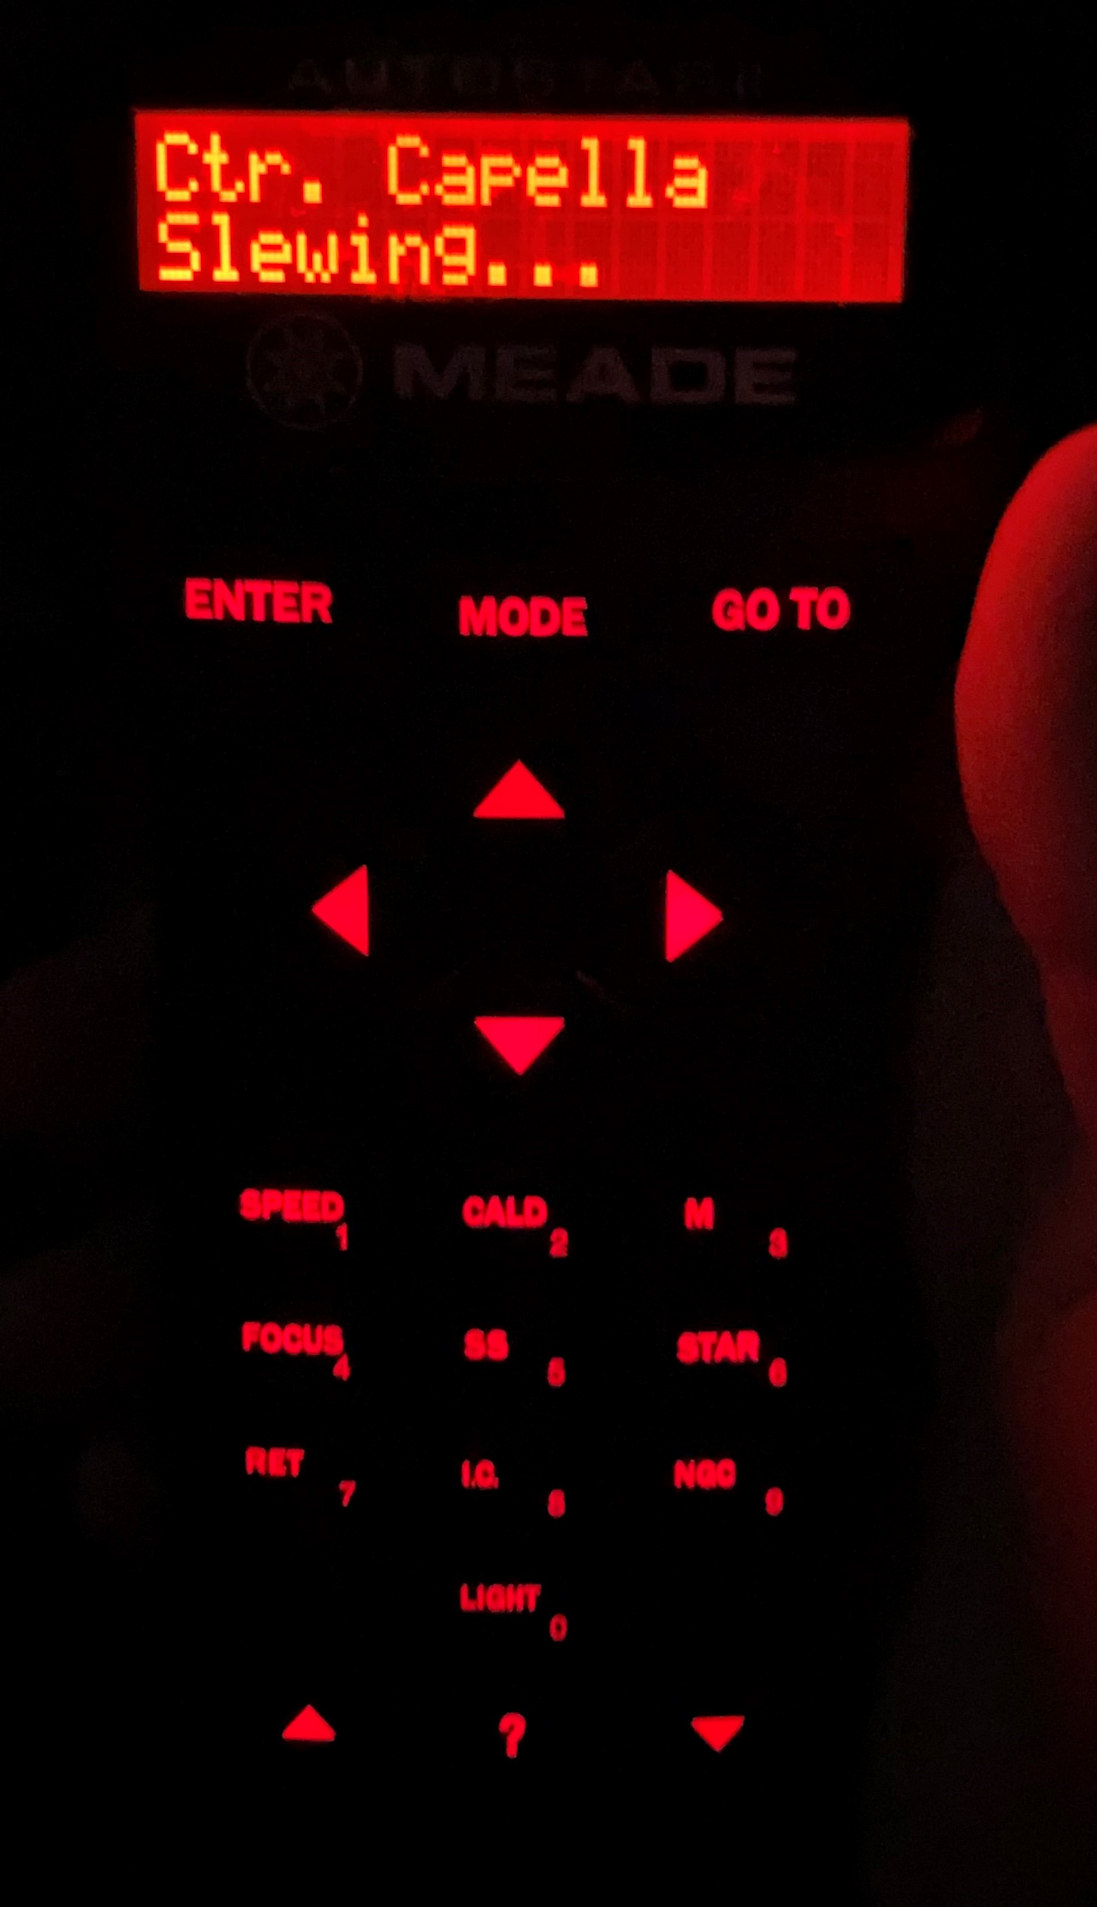
- on the hand paddle press the "GOTO" button
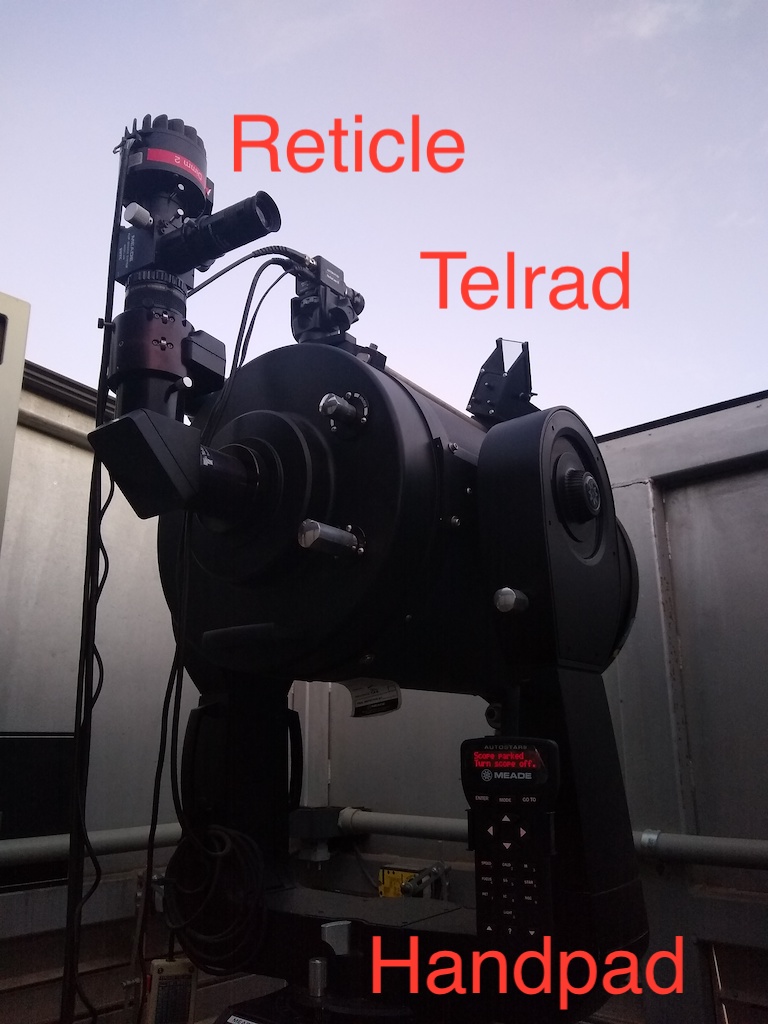
- Turn on the reticle on the telrad finder
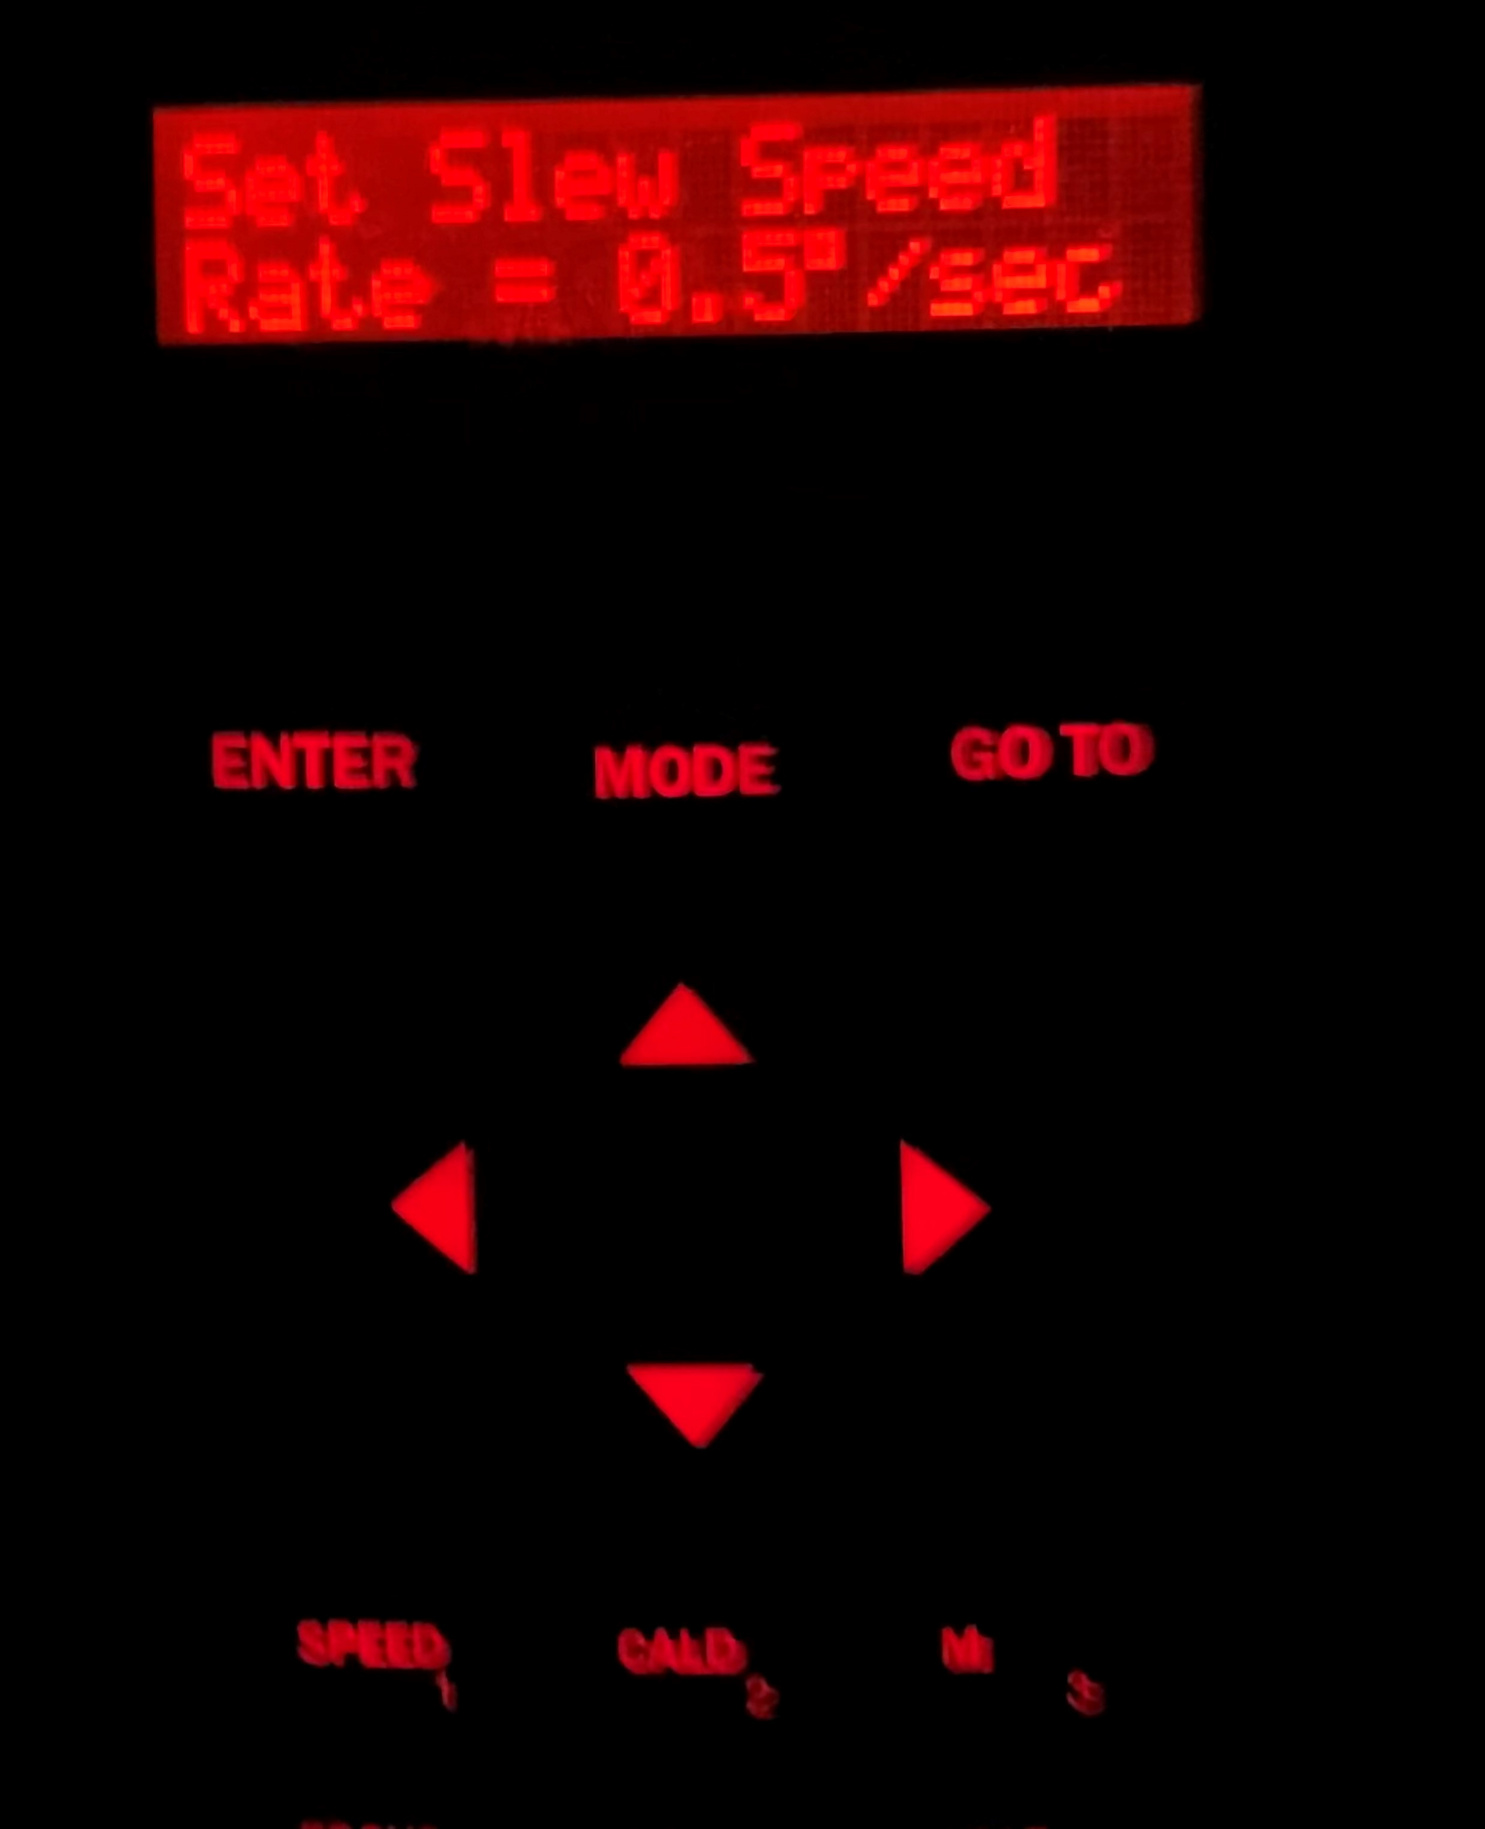
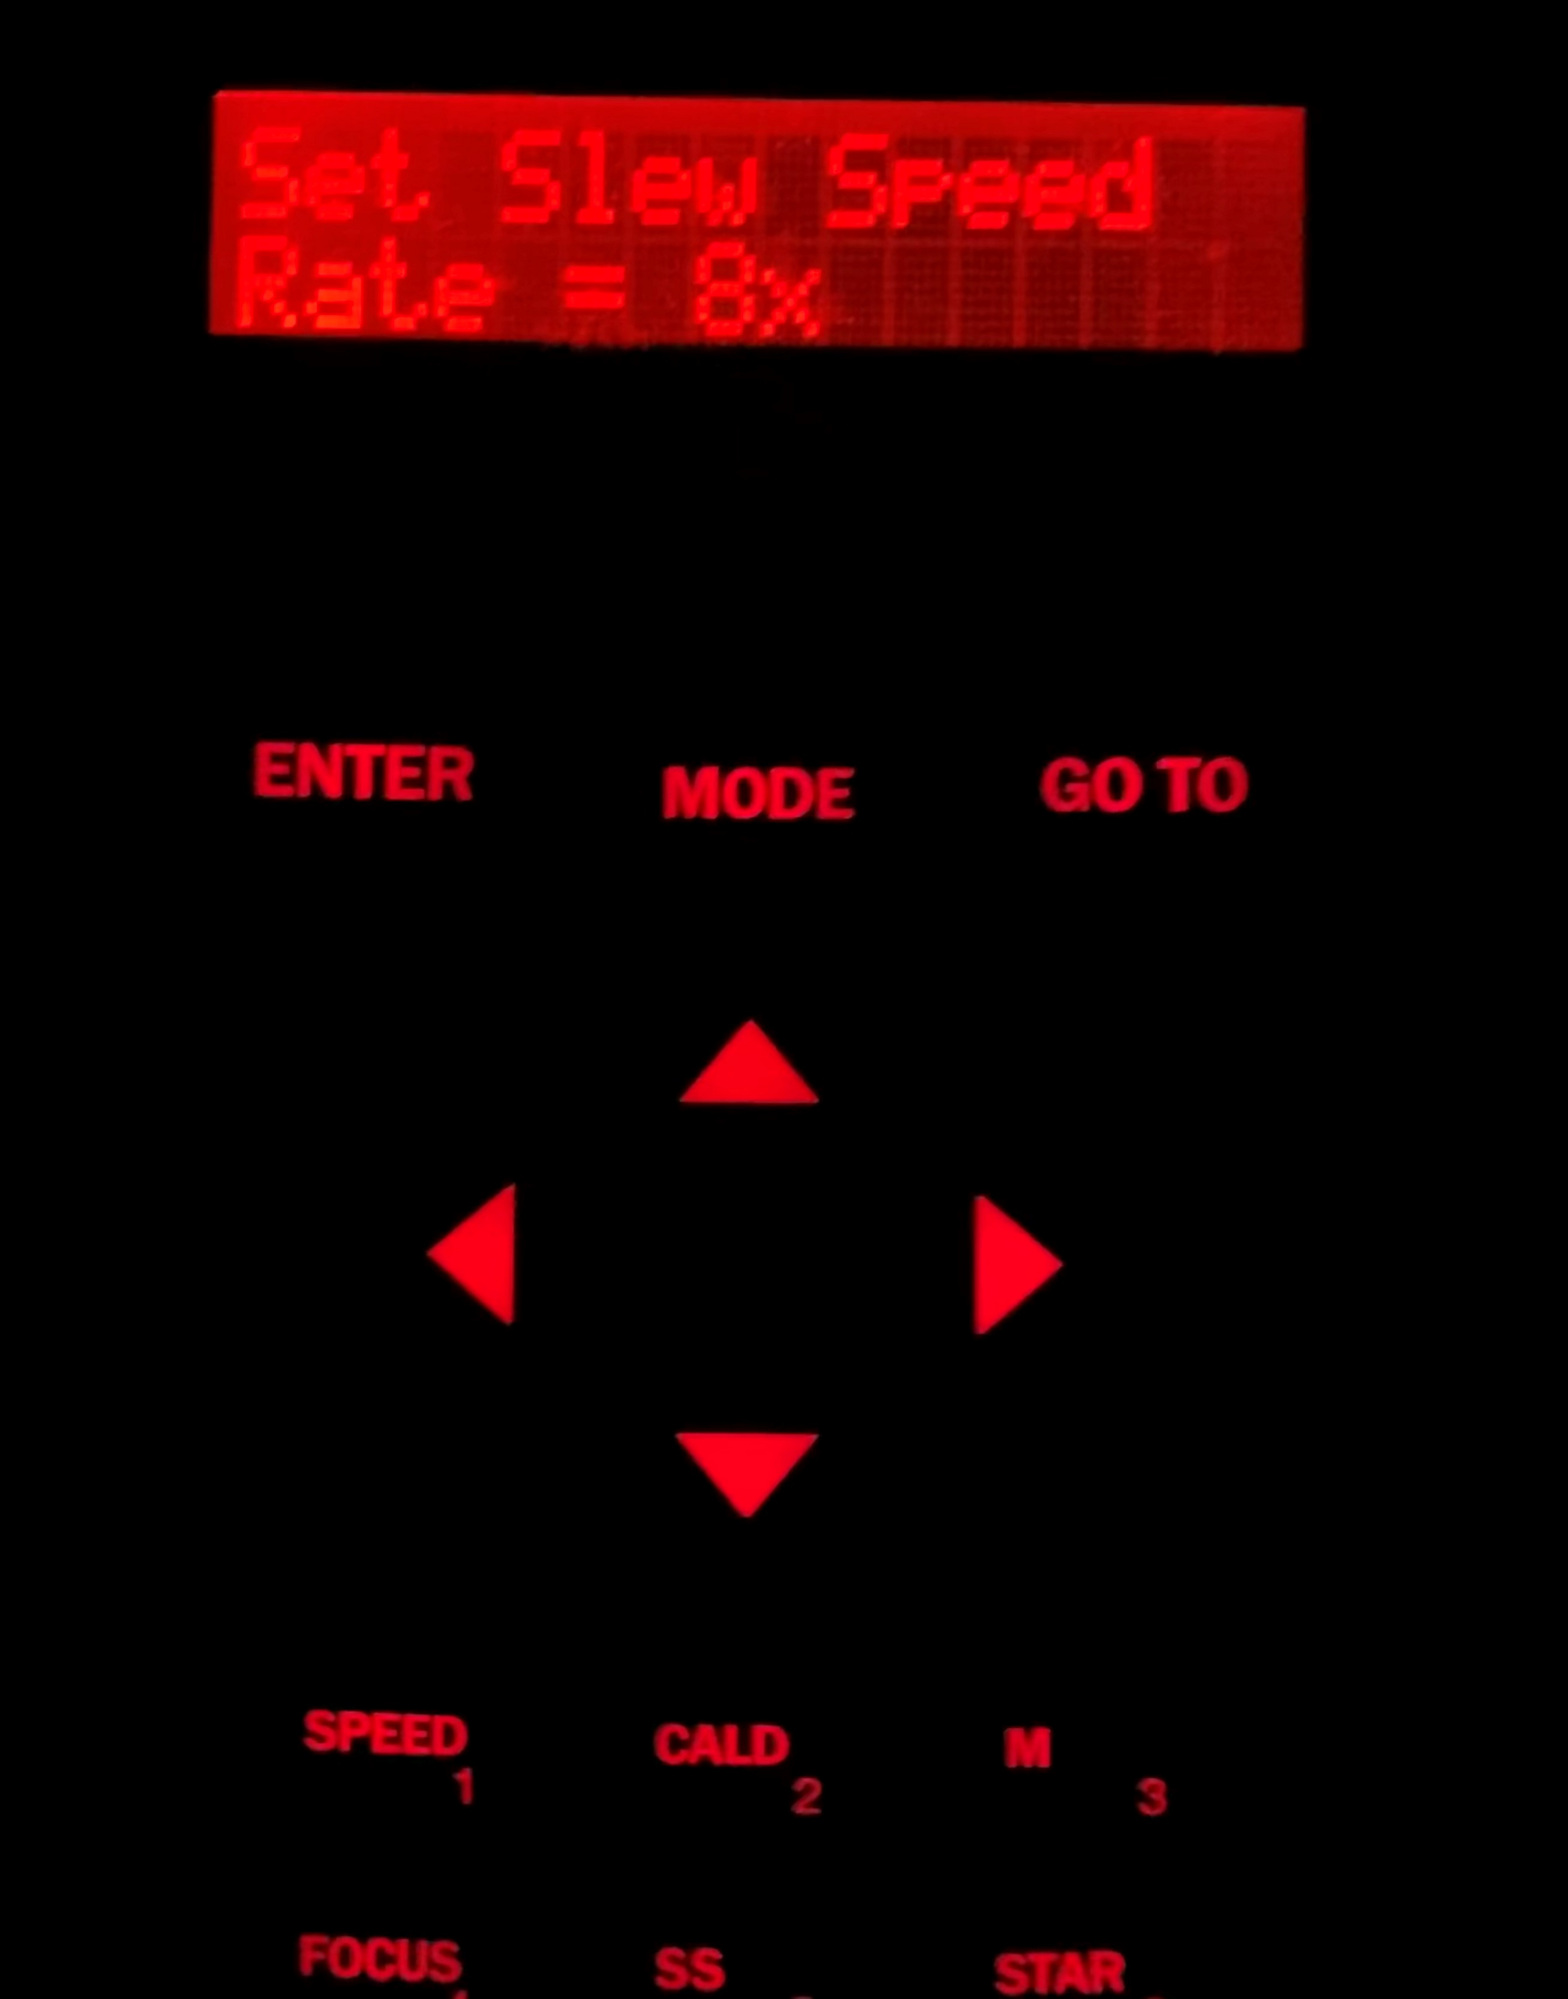
- select the number "1" on the hand paddle to set the speed and then hit another number to select the speed rate, e.g. 1=guide, 9=slew
- center star in the telrad finder
- turn off the reticle
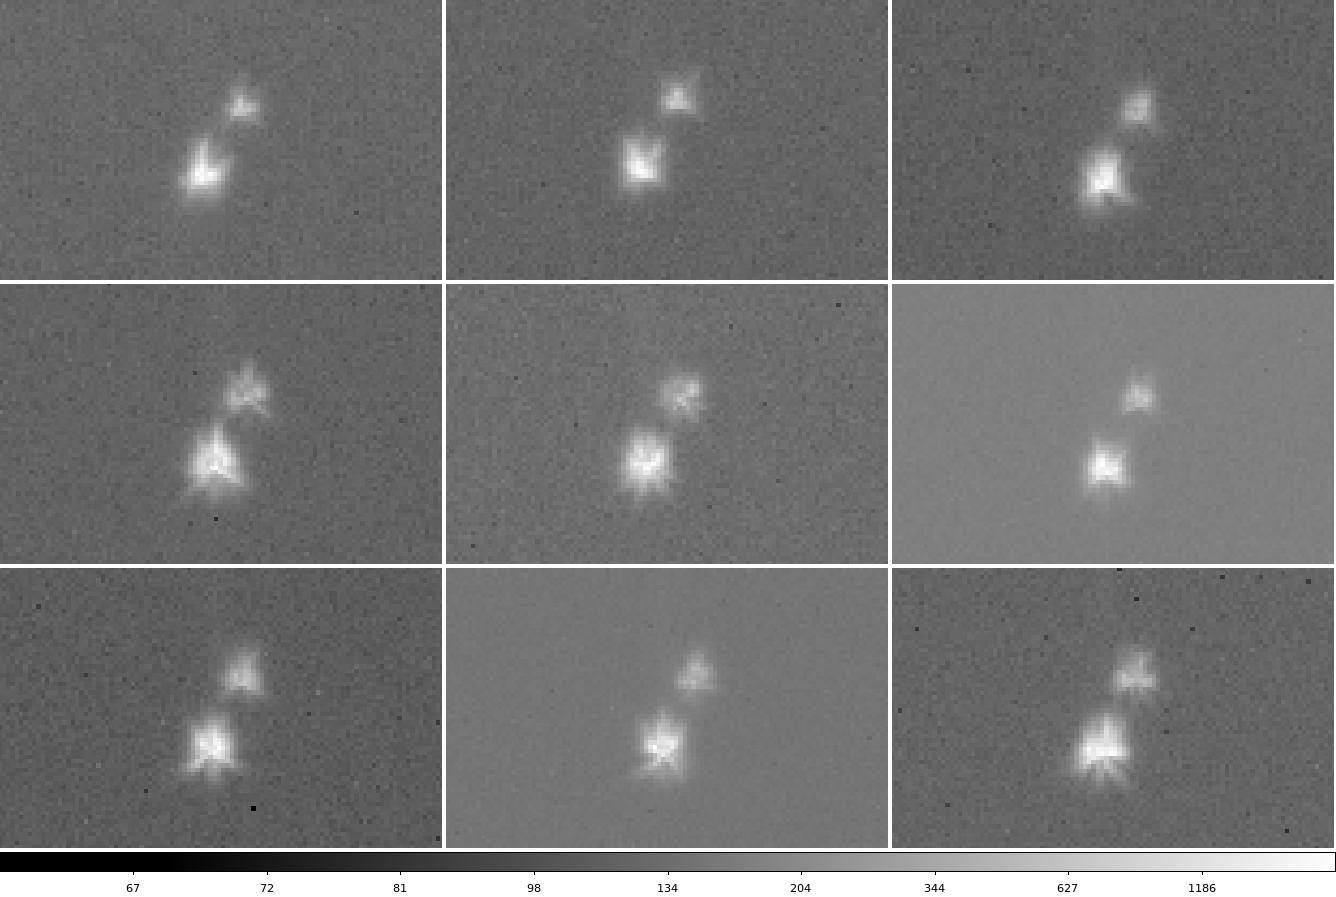
- change the flip mirror on the eye piece so that you can see the star images (there should be two).
- shine your flashlight into the hole where the reticle screws in on the eyepiece to illuminate the rectangular boxes
- use the hand paddle to center the star images into the center of the boxes
- turn flip mirror to the CCD position and turn off the reticle
- on the telescope hand paddle, set the speed to "guide" (#1)
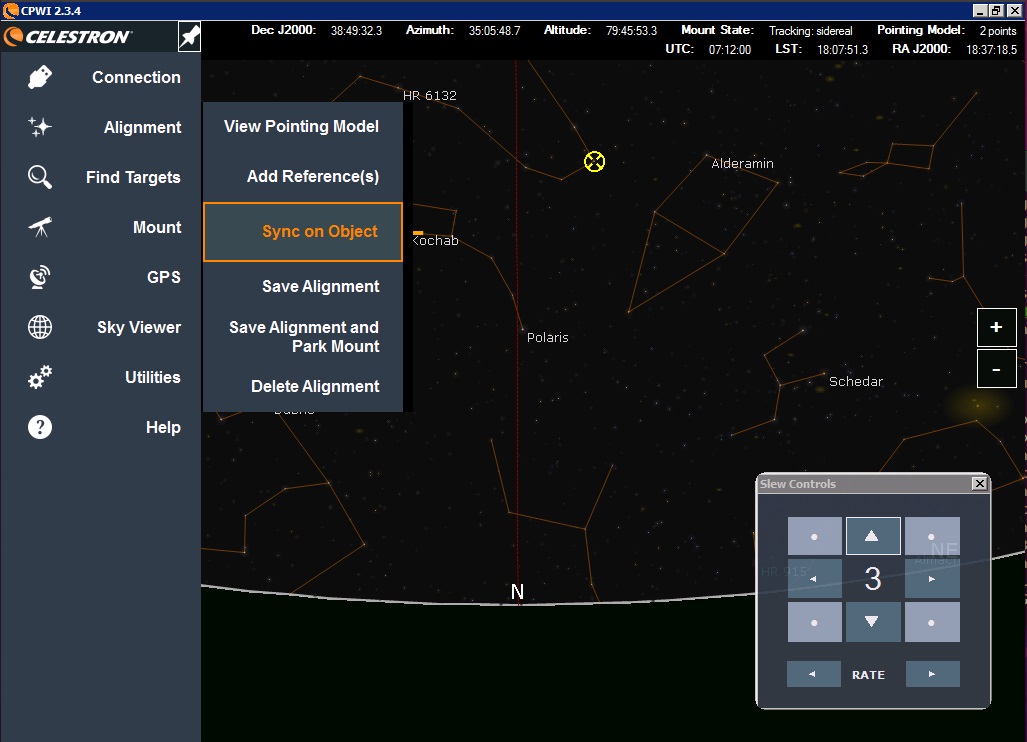
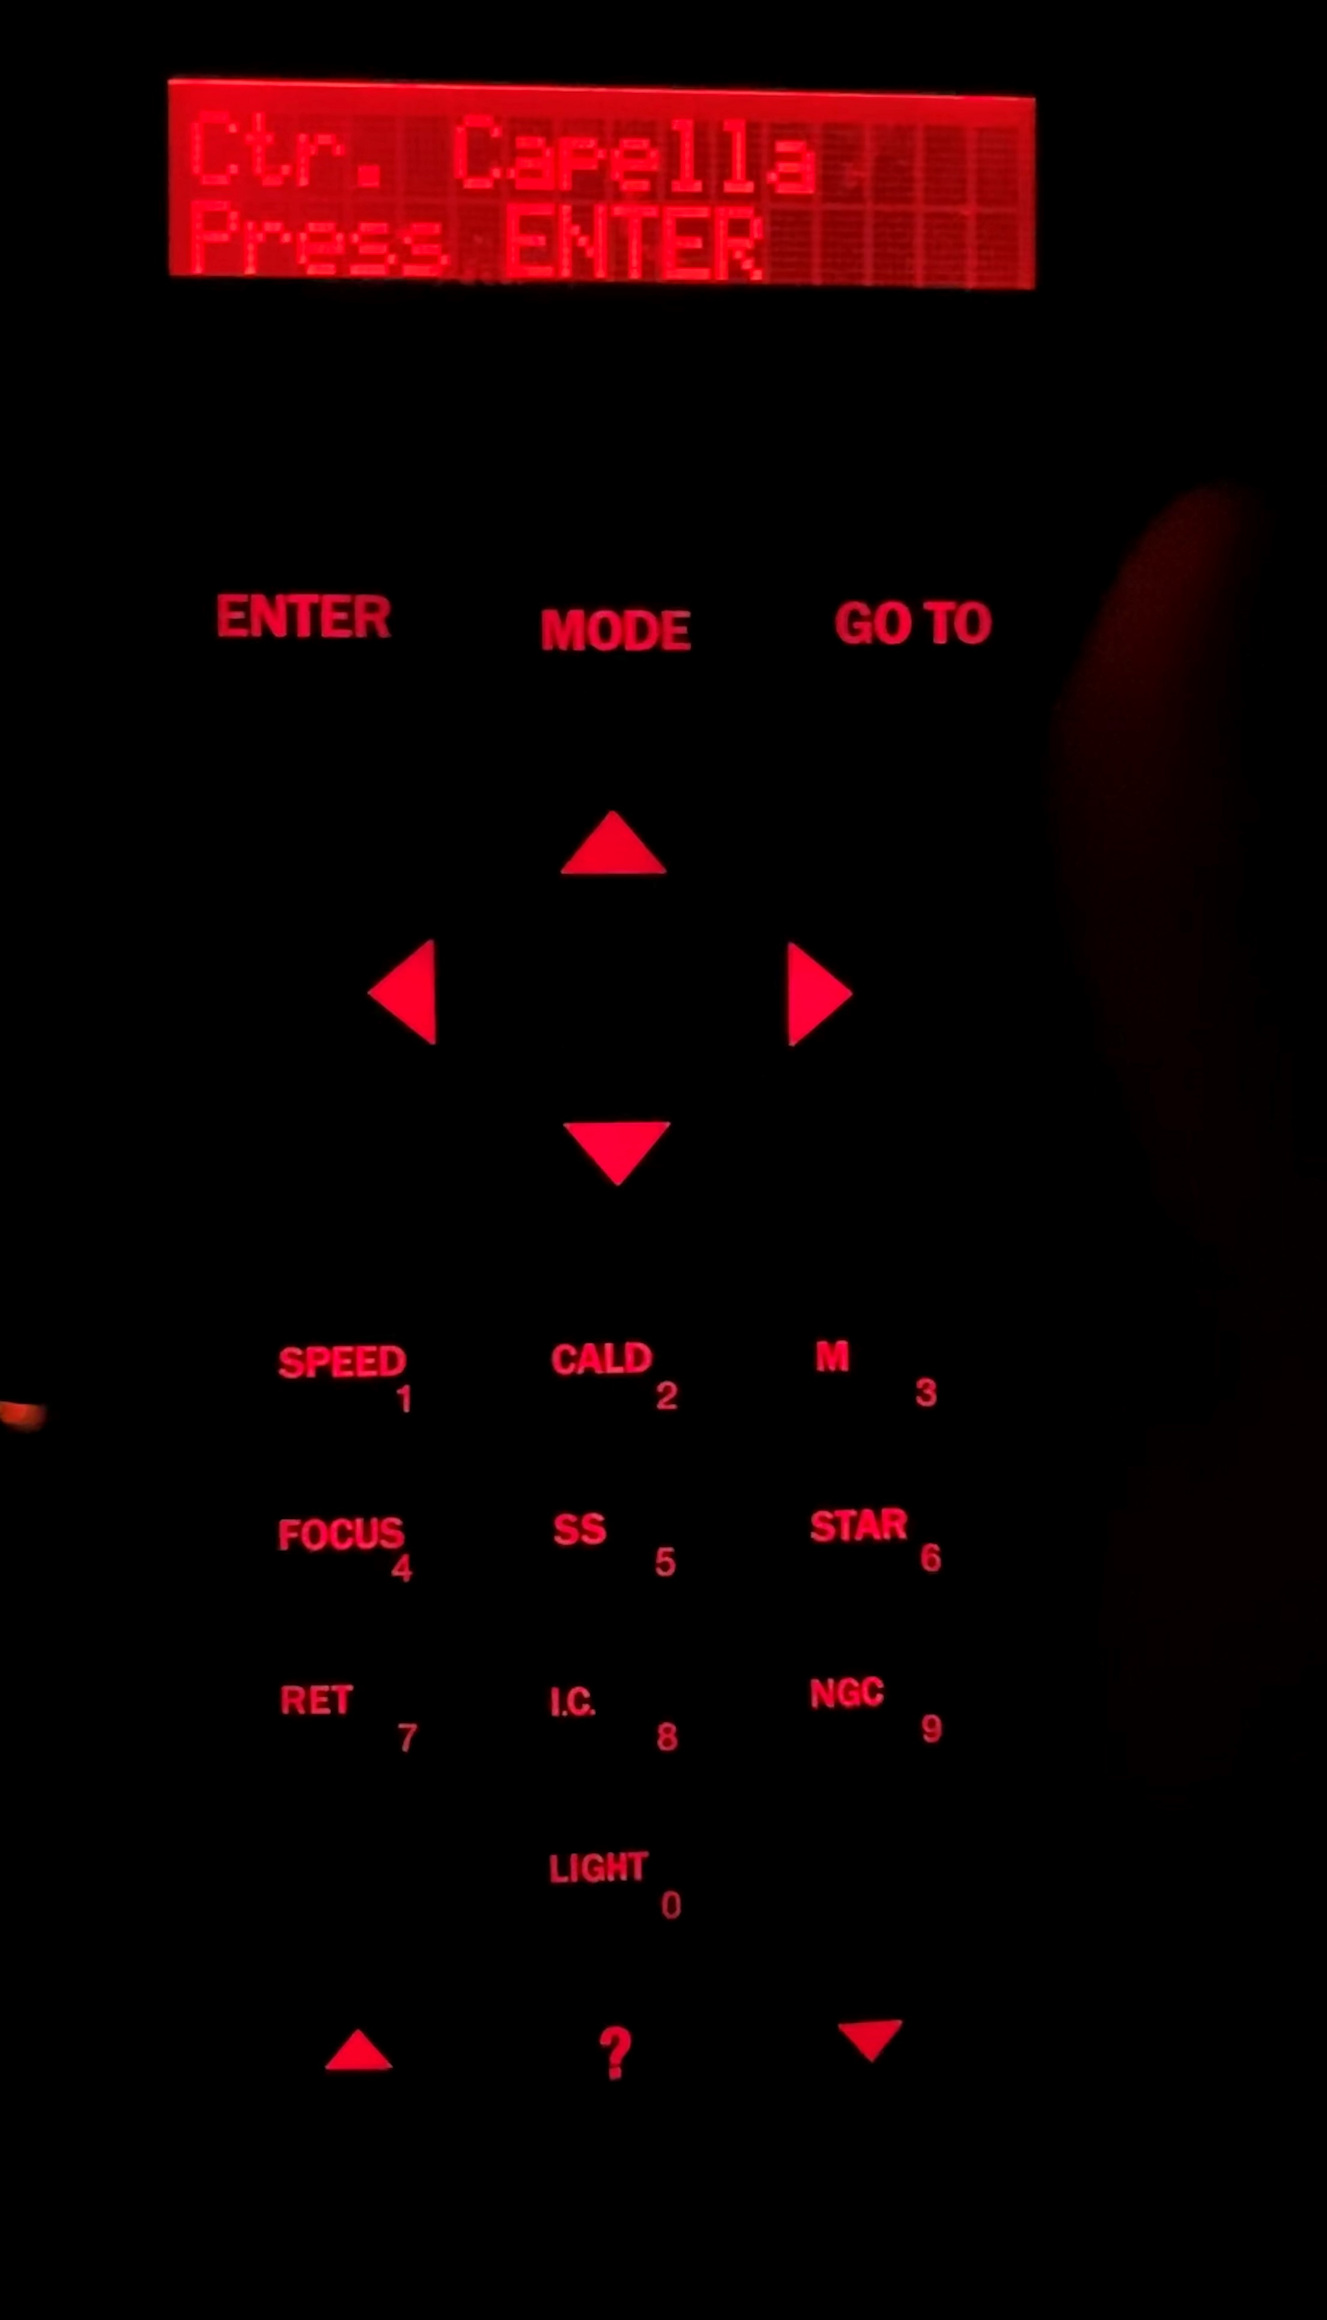
- sync the telescope with the current requested star by holding down the enter button for 5 seconds, then release. It should beep at you and say it sync'd
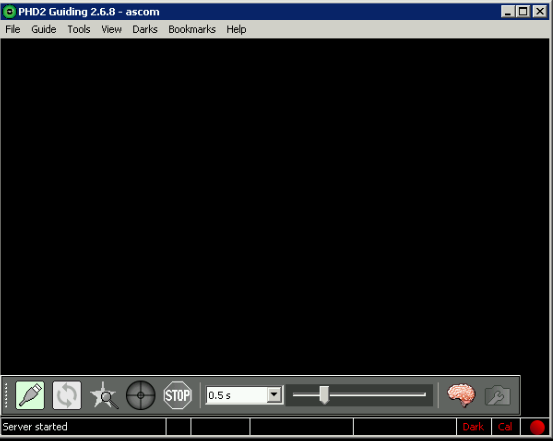
- on the DIMM software, click the "Start Seeing Measurements" button
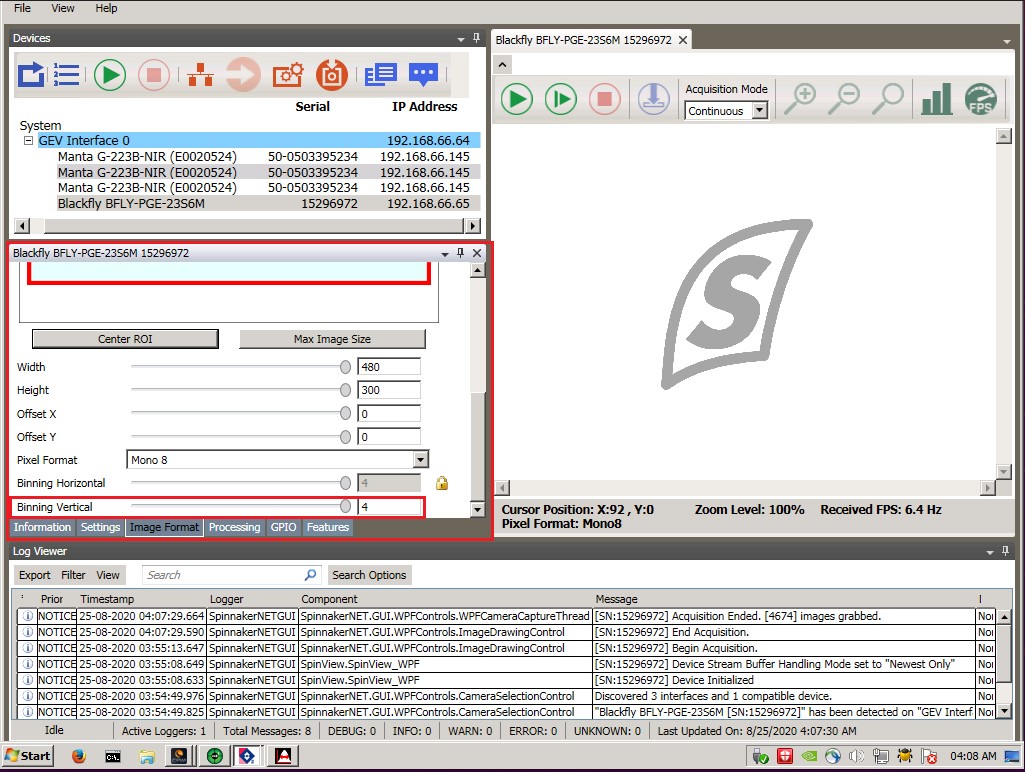
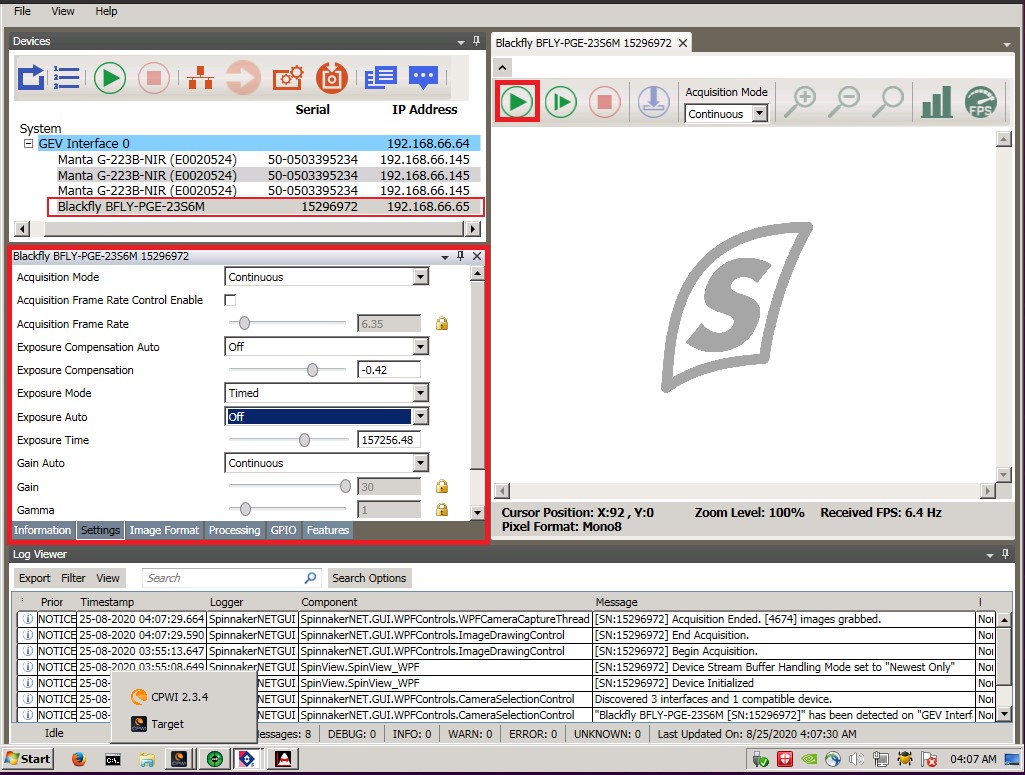
- Note: do not change the binning or exposure times or any other parameters as these may impact the seeing values that are determined.
- also select the radio button for speed to "Guide", and check the "auto-center" check box
- once good seeing measurements are coming in, turn off the computer monitor using the small fob next to the keyboard, close the keyboard tray, and close the door behind you
If the DIMM box gets too big due to winds or very bad seeing you can reset this by going under Settings and hit Apply without making any changes
End of the Night
- Exit the DIMM software ("Exit DIMM" button) and select the option to warm up the CCD (can do on VNC)
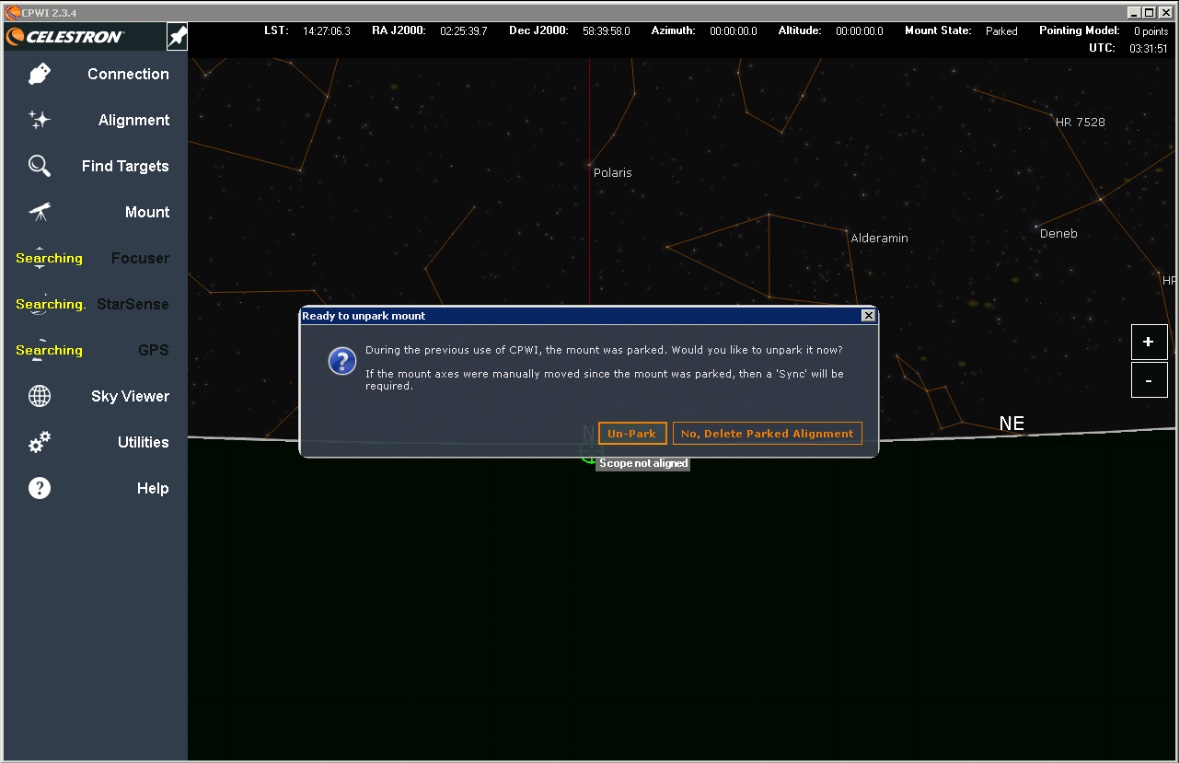
- Park the telescope:
- Either from the VNC:
- Open AutoStarCtrl? on Desktop
- Check the "Connect" box under "Com Port" (wait)
- Under "Utilities" click "Park Scope"
- or using the telescope hand paddle:
- Hit the "MODE" button a few times to get out of named star mode
- Find the Utilities option and hit enter
- Select the "Park" option to move the telescope to level
- Allow to finish moving and report back "Power down telescope"
- Either from the VNC:
- Once the Park is complete turn off the telescope power at the base of the telescope
- Once the DIMM software has warmed the CCD and closed turn off the CCD power on the black box on the far side of the enclosure
- Close the roof shutter with a single press and release of the green button just inside the door
- Close the louvres by holding down the close louvre button just inside the door
- Double check that all louvres are closed; sometimes they stick open.
- Turn off the computer monitor with the fob next to the keyboard
- Lock the door and close firmly (knee optional)
Changing the DIMM star with the AUTOSTAR software package
Close dimm program (actions, exit)
Open autostar gui
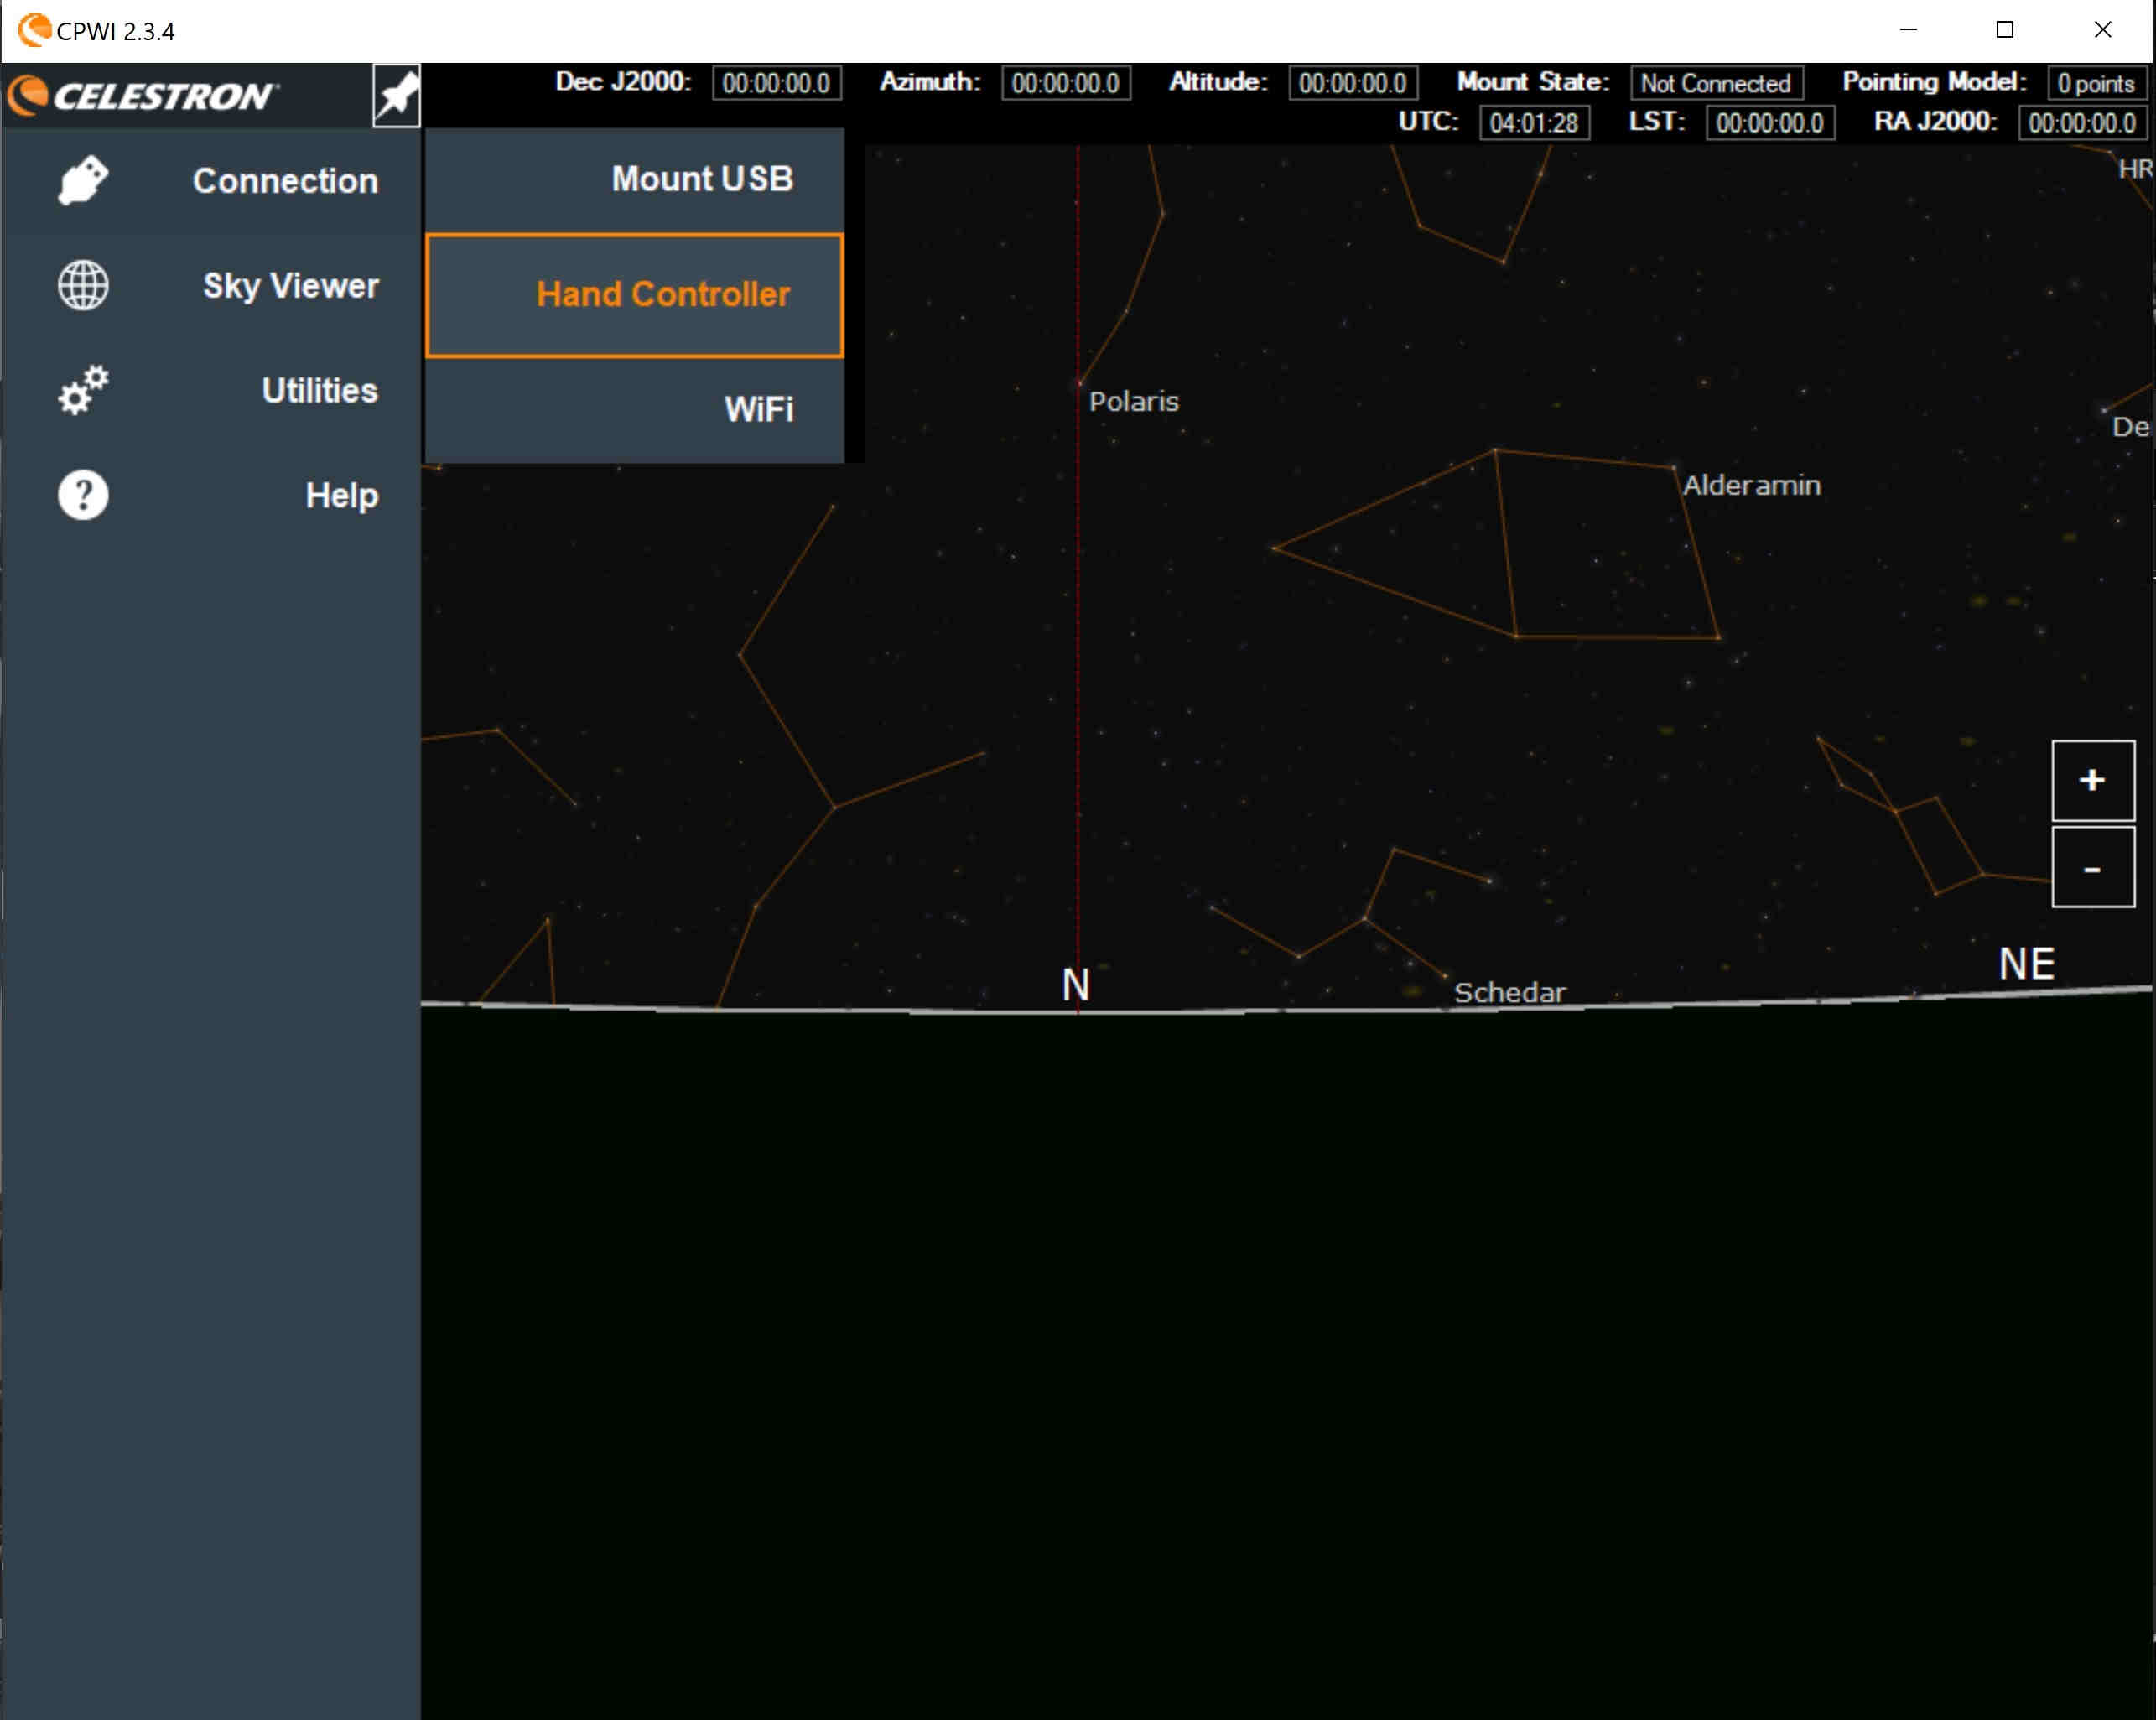
click the comm. port connect (left-most) near bottom of gui (Telescope must be powered on)
Will see :Initializing..." in the Options window
Choose Object from menu in left-hand window (AutoStarMenu)
Named stars ---> current star name displayed in right window
Select desired star using ScrollUp or ScrollDn
- Hit Enter when desired star is reached.
GoTo
Turn on video switch 9 to see wide field view
To center the star
- Set "Slew Rate" to Find
- Use Autostar hand paddle arrows to move N,S,E,W
Close Autostar (upper right cross)
Restart DIMM program
If you have to move star with "hand paddle" icon, use "Center" speed
Use DIMM handpaddle arrow (Center) to move star to center star (if needed)
- set to "Take Images"
- when centered, swith to "Start Seeing Measurements"
- when measurenets begin, hit "Auto Center"
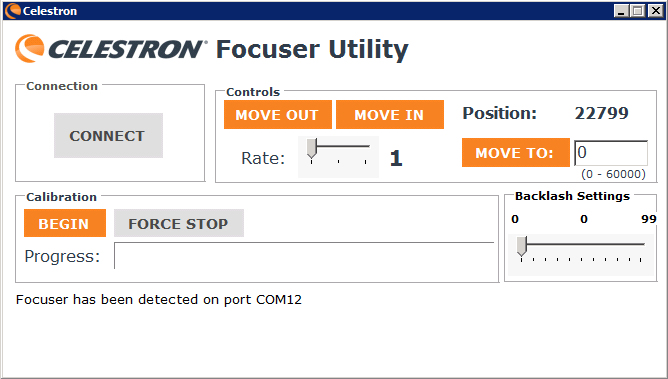
To adjust focus (if needed) use F- and F+ buttons near the hand paddle icon.
- best to change the Move Focus for" box to a value of 100 (????) millisec
Hit "Start Seeing Measurement" when star is focused and centered.
To park the DIMM
Exit DIMM program
STart AutoStar
Hit Comm. Port Connect
Utilities
Park Scope
Troubleshooting:
If the DIMM enclosure roll-up roof will not open/close, try re-seating the blue-ended cable which plugs into the grey electrical box where those buttons are mounted.
Attachments (46)
- moon_flir_crop.jpg (29.3 KB) - added by stevenj 4 years ago.
- moon_starshot_crop.jpg (24.9 KB) - added by stevenj 4 years ago.
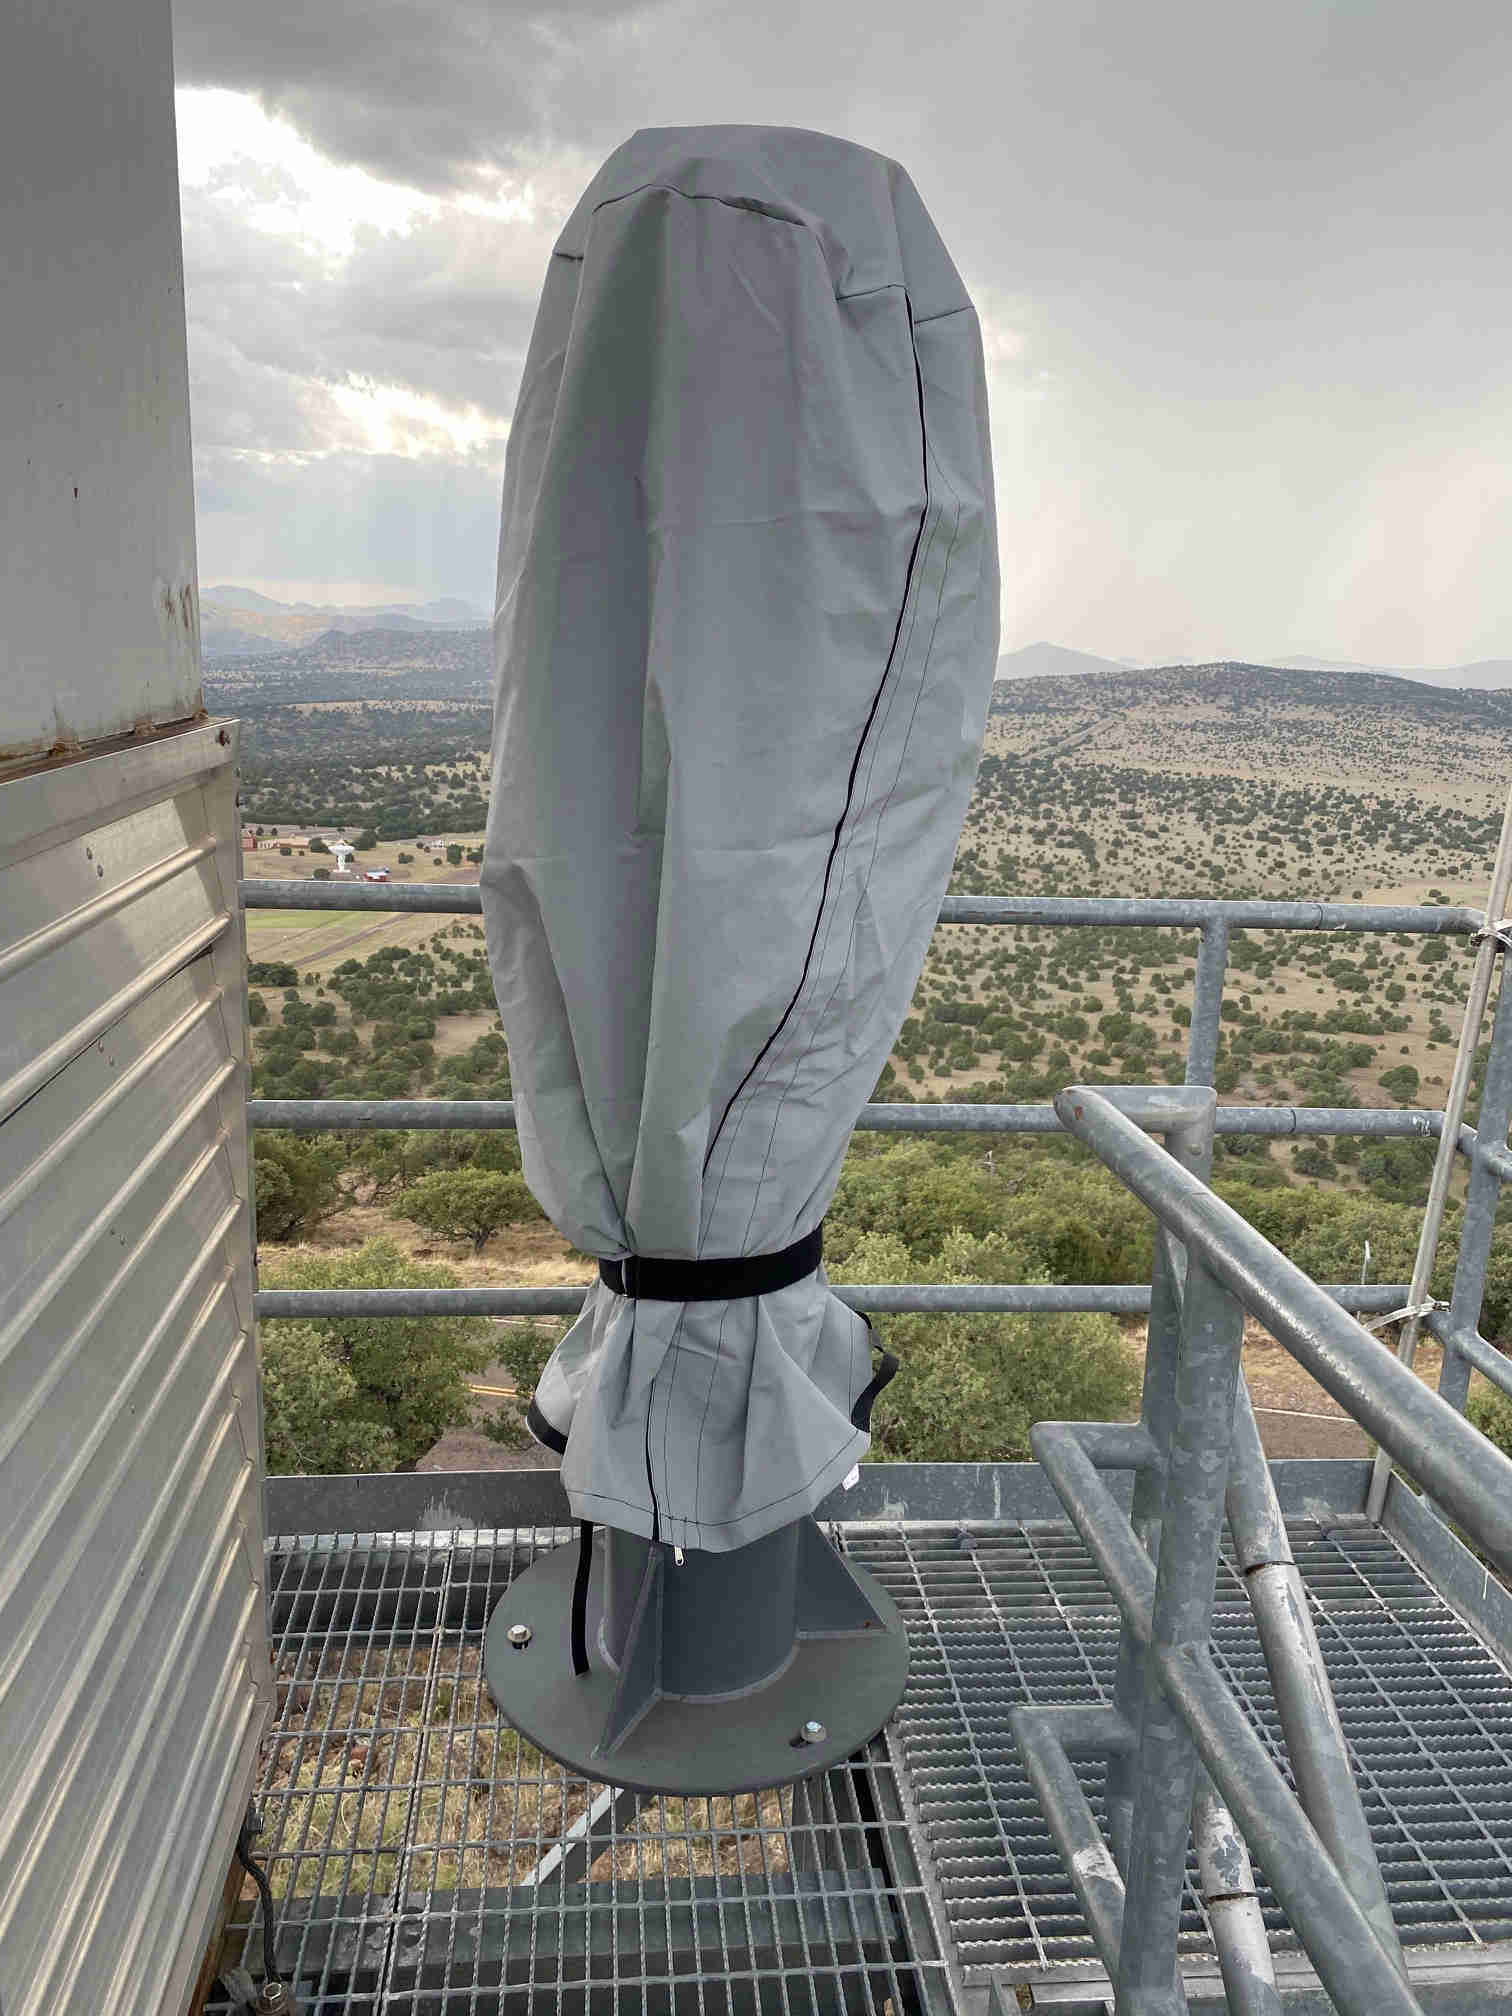
- dimm_on_enclosure.jpg (170.0 KB) - added by stevenj 4 years ago.
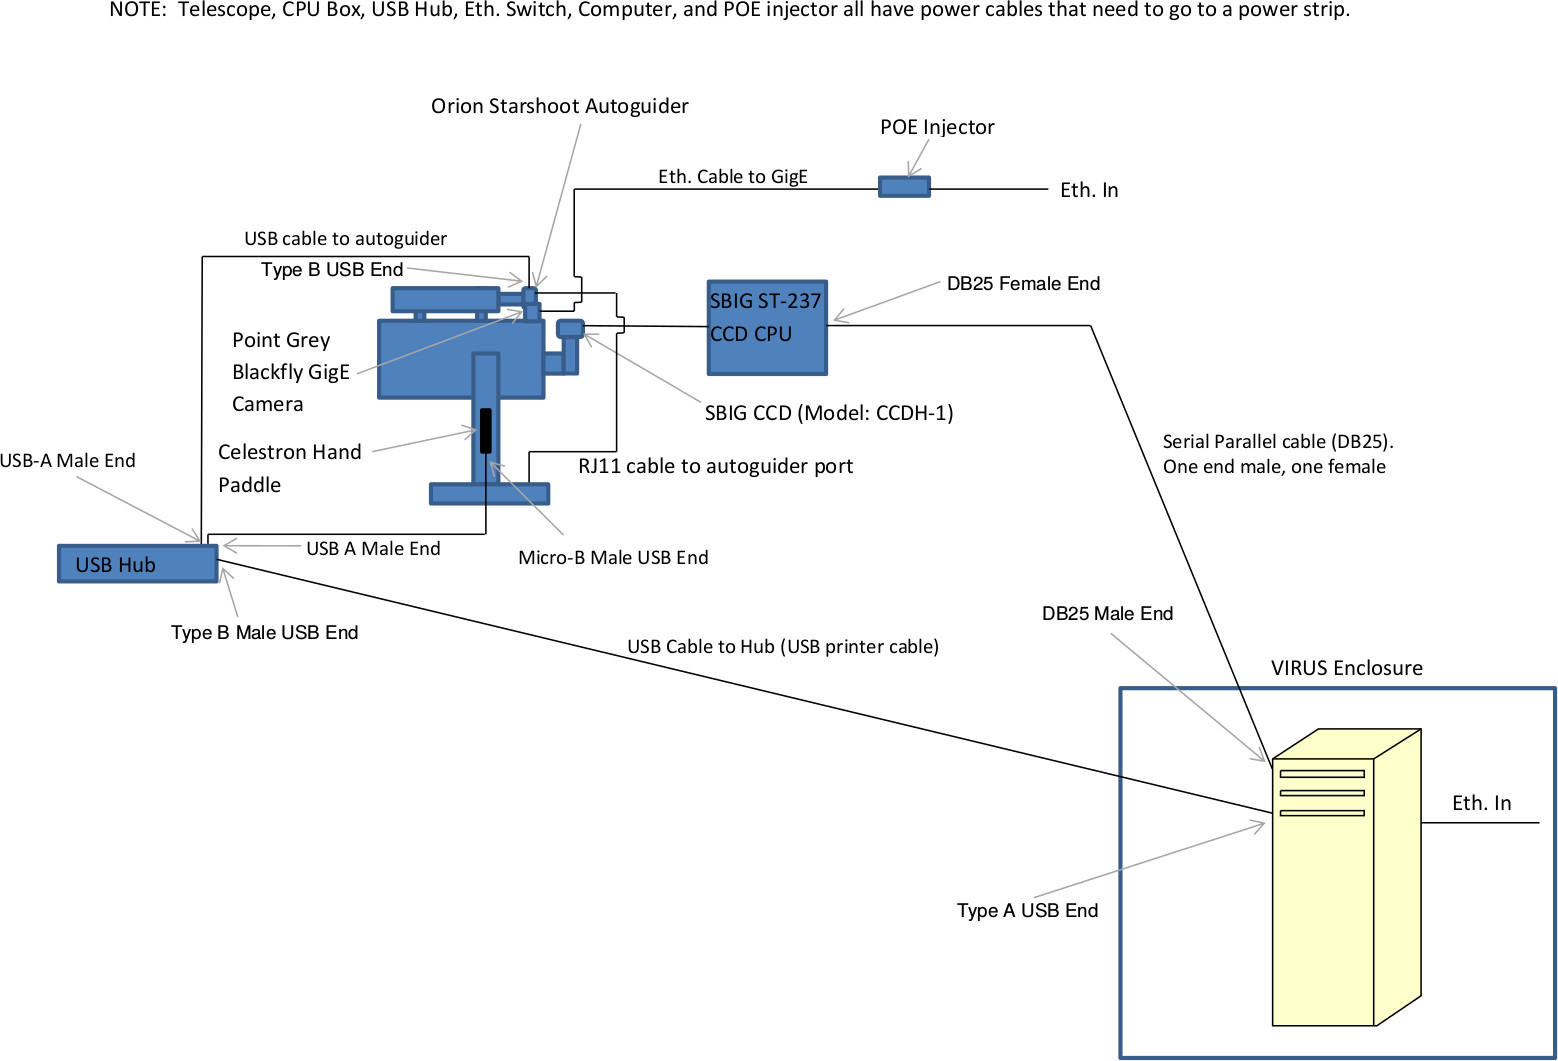
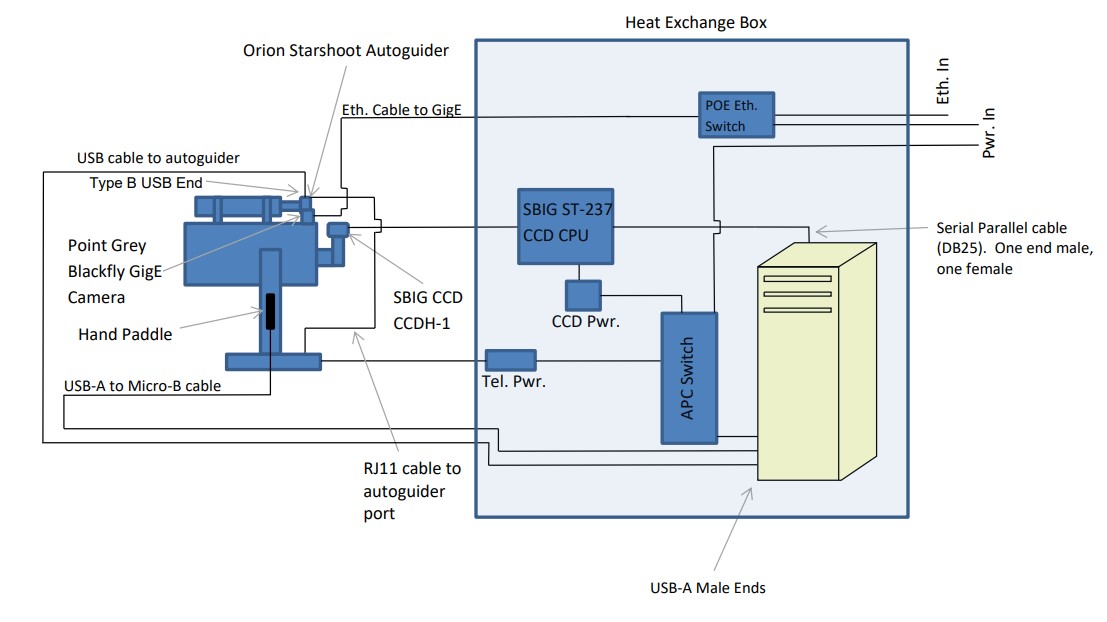
- DIMM2CableDiagram2.jpg (136.9 KB) - added by stevenj 4 years ago.
- CPWIicon.png (23.0 KB) - added by justenp 4 years ago.
- Disconnect.jpg (162.7 KB) - added by justenp 4 years ago.
- Fig1ConnectingHandPaddle.jpg (202.6 KB) - added by justenp 4 years ago.
- PHD2_bullseye.jpg (229.3 KB) - added by justenp 4 years ago.
- PHD2_Connect.jpg (129.8 KB) - added by justenp 4 years ago.
- PHD2Main.png (20.6 KB) - added by justenp 4 years ago.
- SaveAlignmentandPark.jpg (164.6 KB) - added by justenp 4 years ago.
- Screenshot from 2020-06-18 04-14-05.jpg (37.5 KB) - added by justenp 4 years ago.
- SlewControls.jpg (170.6 KB) - added by justenp 4 years ago.
- SyncOnObject.jpg (173.7 KB) - added by justenp 4 years ago.
- unpark.jpg (121.2 KB) - added by justenp 4 years ago.
- dimm1_mizar.jpeg (102.6 KB) - added by stevenj 4 years ago.
- 2020_07_15.jpg (83.6 KB) - added by justenp 4 years ago.
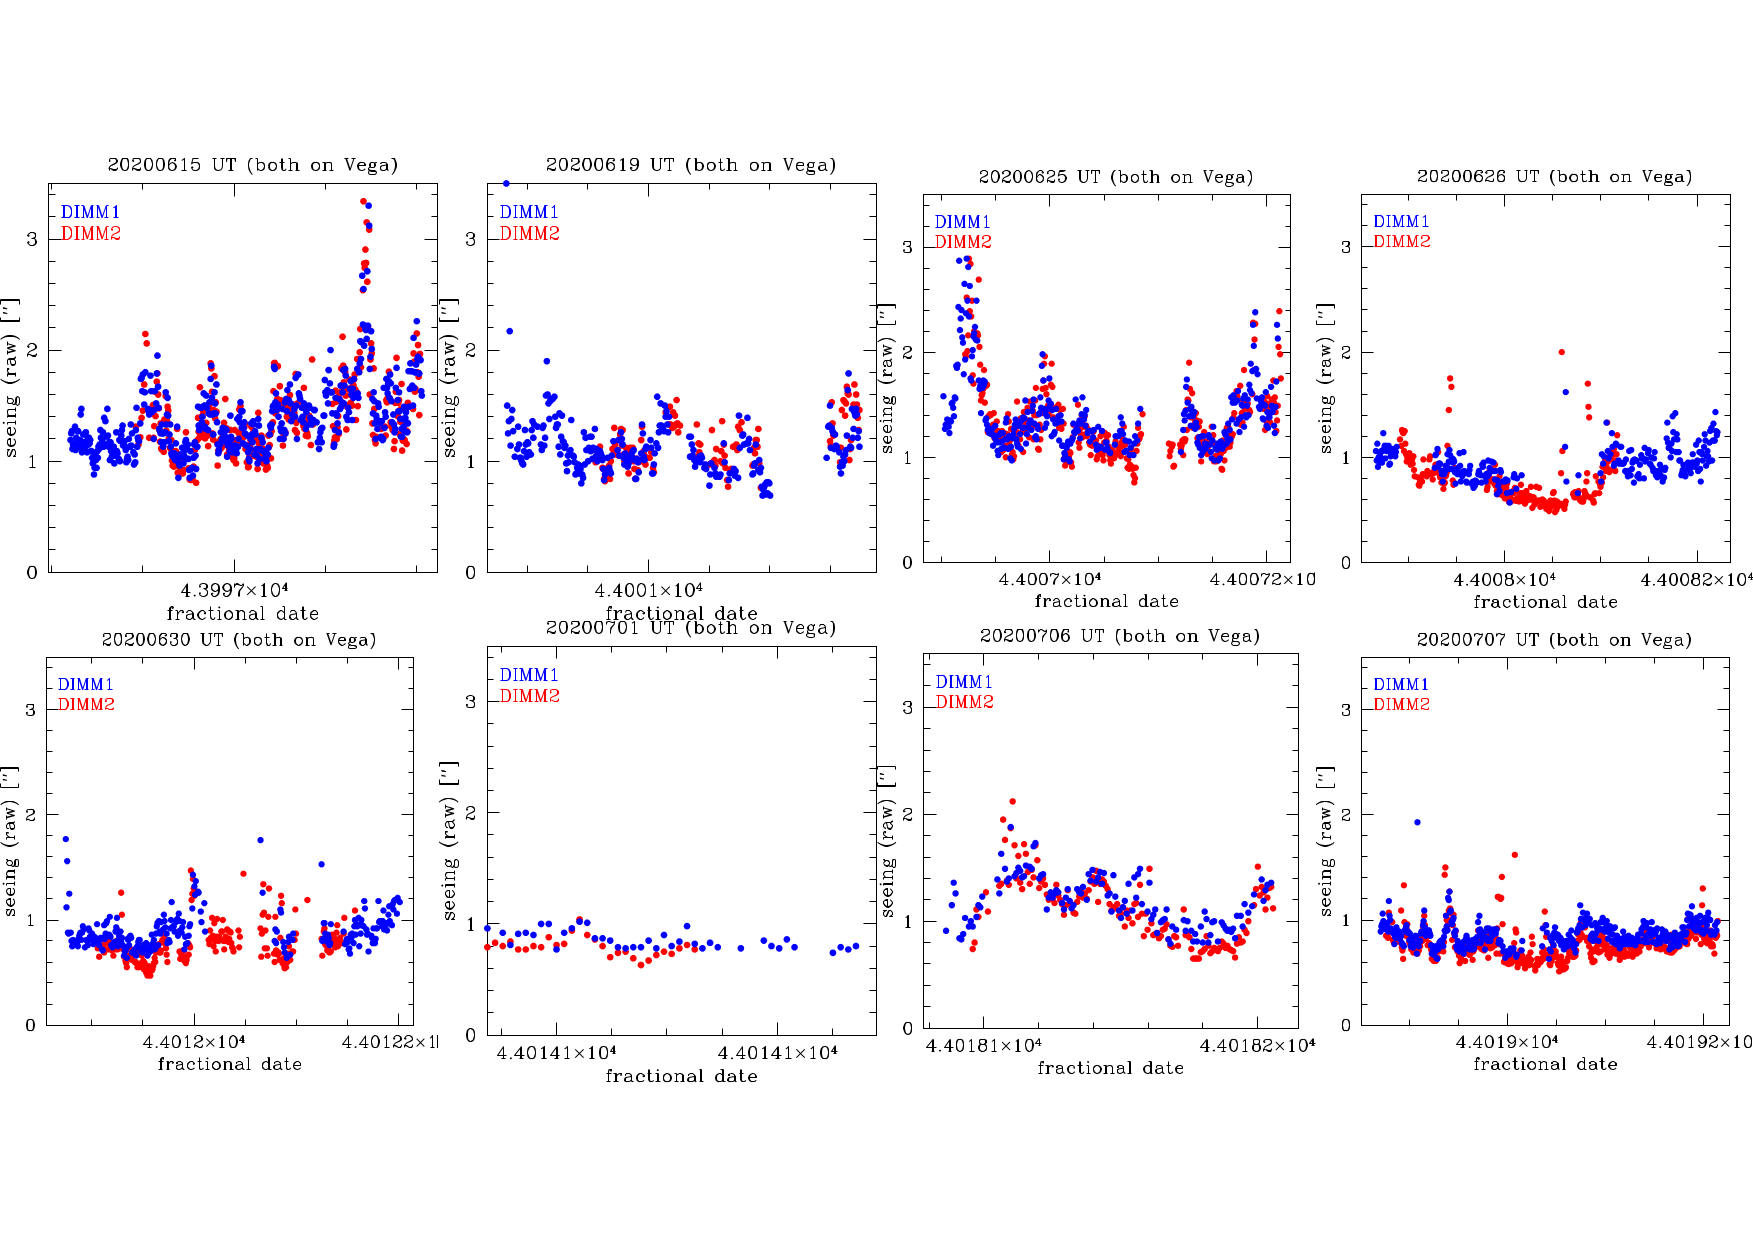
- dimm_bothvega.jpg (238.8 KB) - added by stevenj 4 years ago.
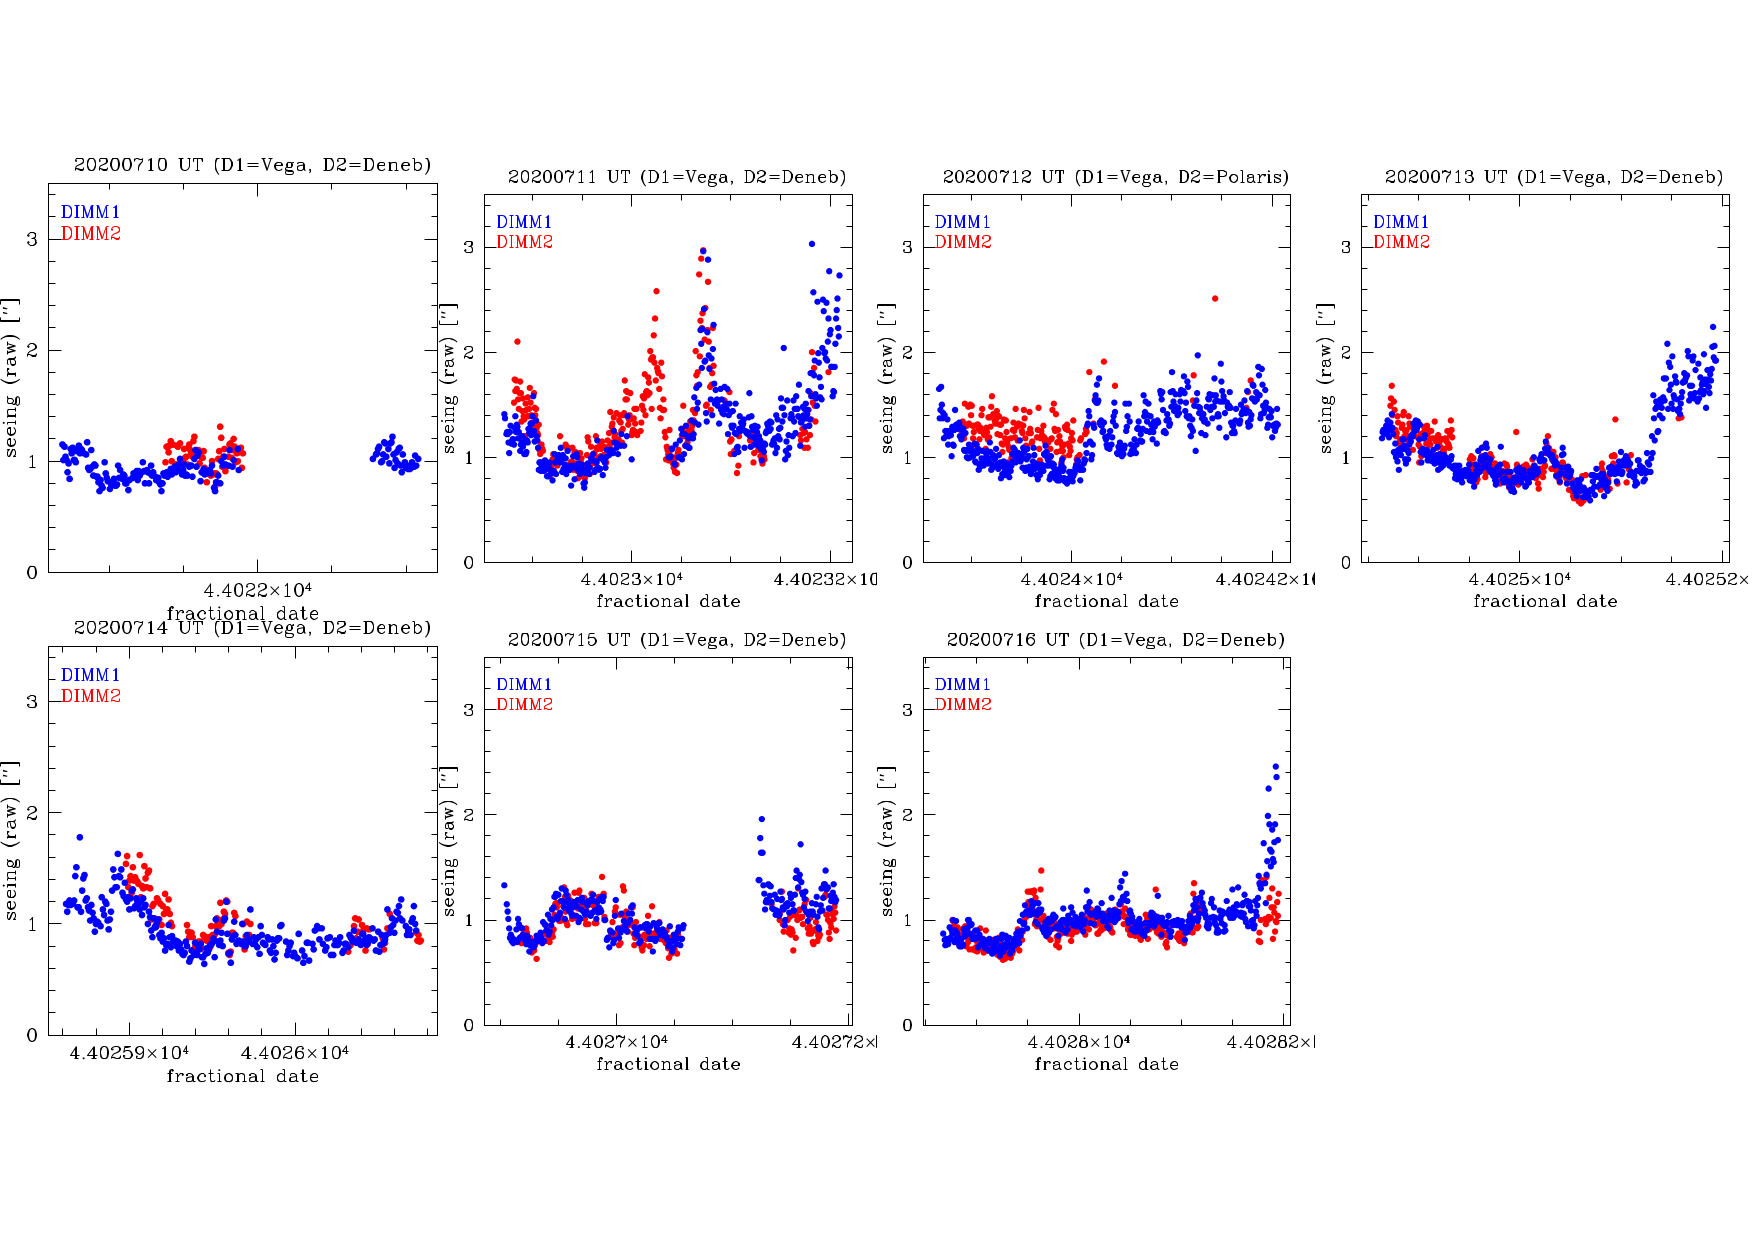
- dimm_vega_other.jpg (232.7 KB) - added by stevenj 4 years ago.
- CCDPowerCompressed.jpg (199.4 KB) - added by justenp 4 years ago.
- ComputerPowerCompressed.jpg (203.9 KB) - added by justenp 4 years ago.
- LatchesCompressed.jpg (202.7 KB) - added by justenp 4 years ago.
- MasterPowerCompressed.jpg (205.0 KB) - added by justenp 4 years ago.
- OutsideEnclCompressed.jpg (203.0 KB) - added by justenp 4 years ago.
- RemoteSetup.jpg (203.1 KB) - added by justenp 4 years ago.
- DIMM2_map_2020_08_05_lo.jpg (190.2 KB) - added by stevenj 4 years ago.
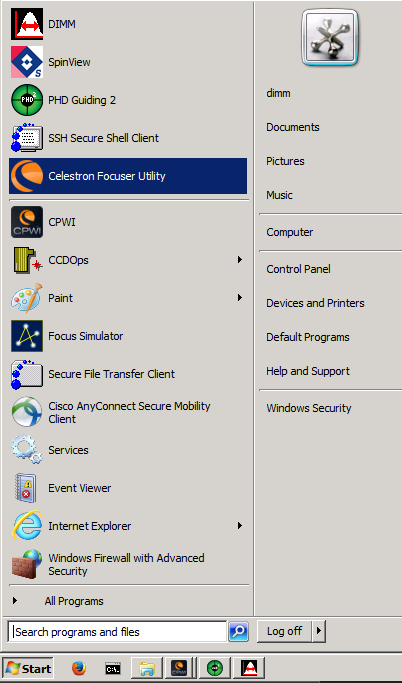
- OpenFocusUtility.jpg (198.2 KB) - added by justenp 4 years ago.
- FocuserSettings.jpg (153.3 KB) - added by justenp 4 years ago.
- SpinImageFormat.jpg (230.6 KB) - added by justenp 4 years ago.
- SpinSettings.jpg (229.5 KB) - added by justenp 4 years ago.
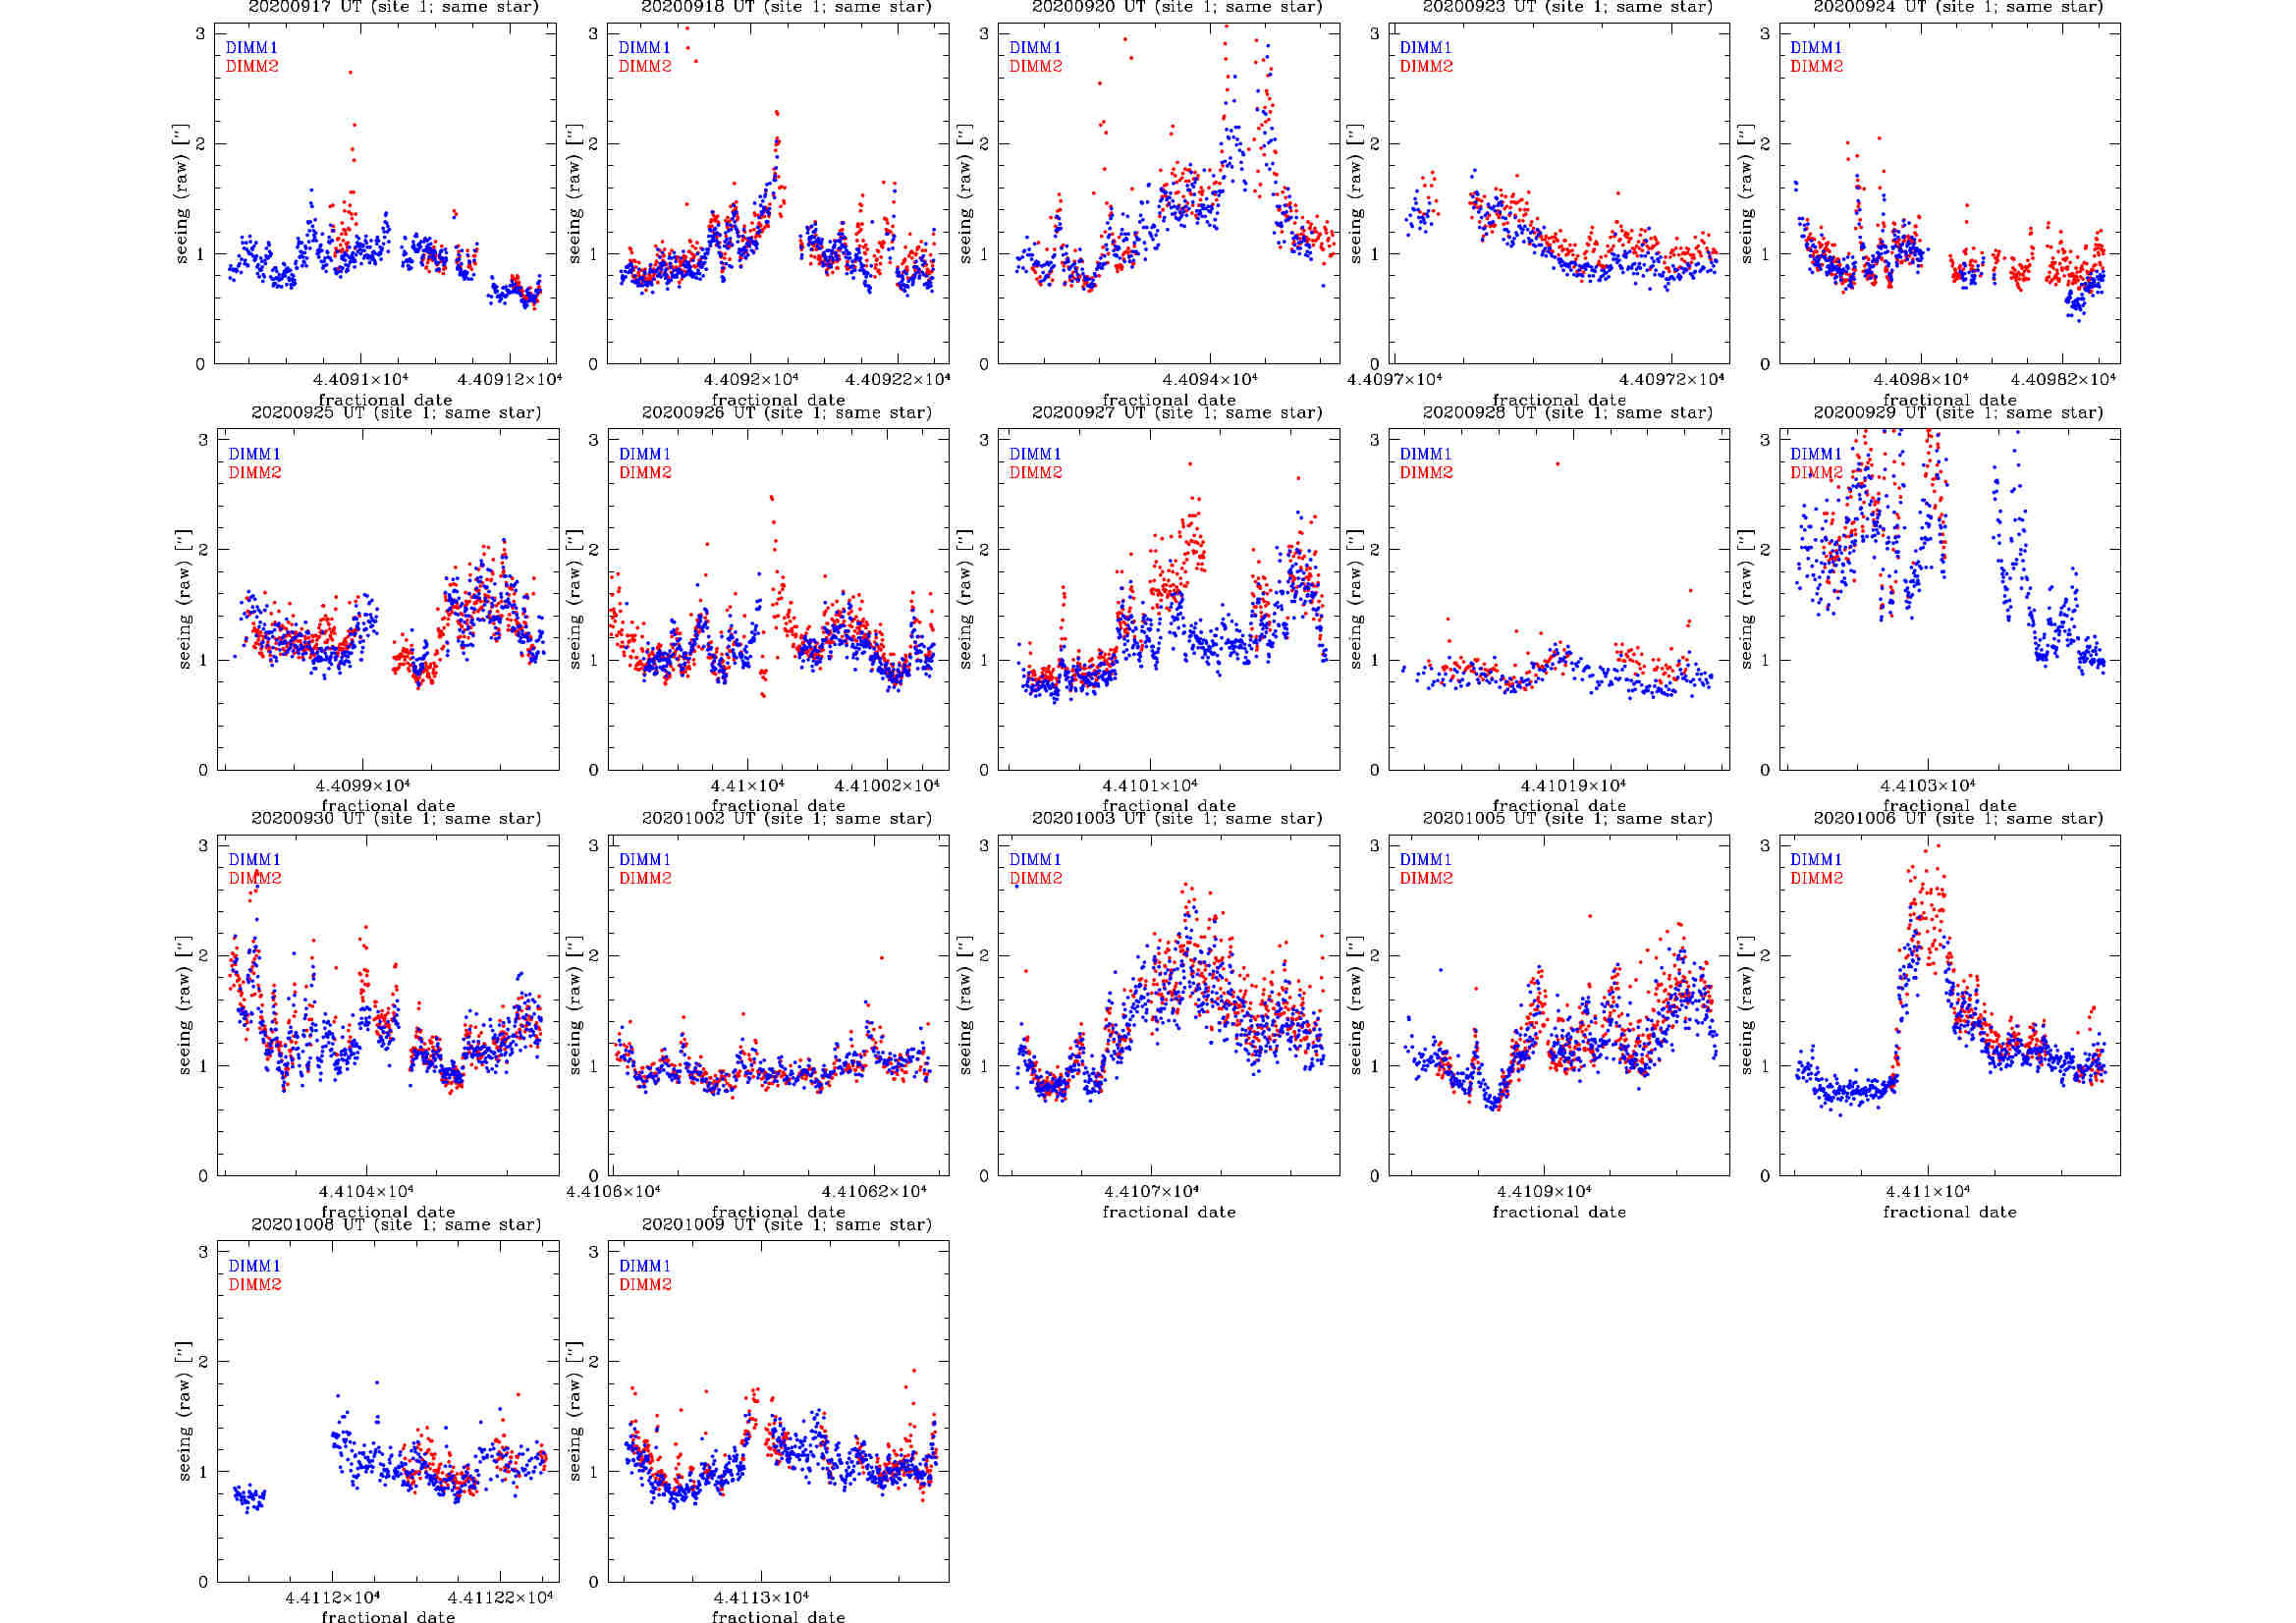
- dimm2_site1_same.jpg (239.6 KB) - added by stevenj 4 years ago.
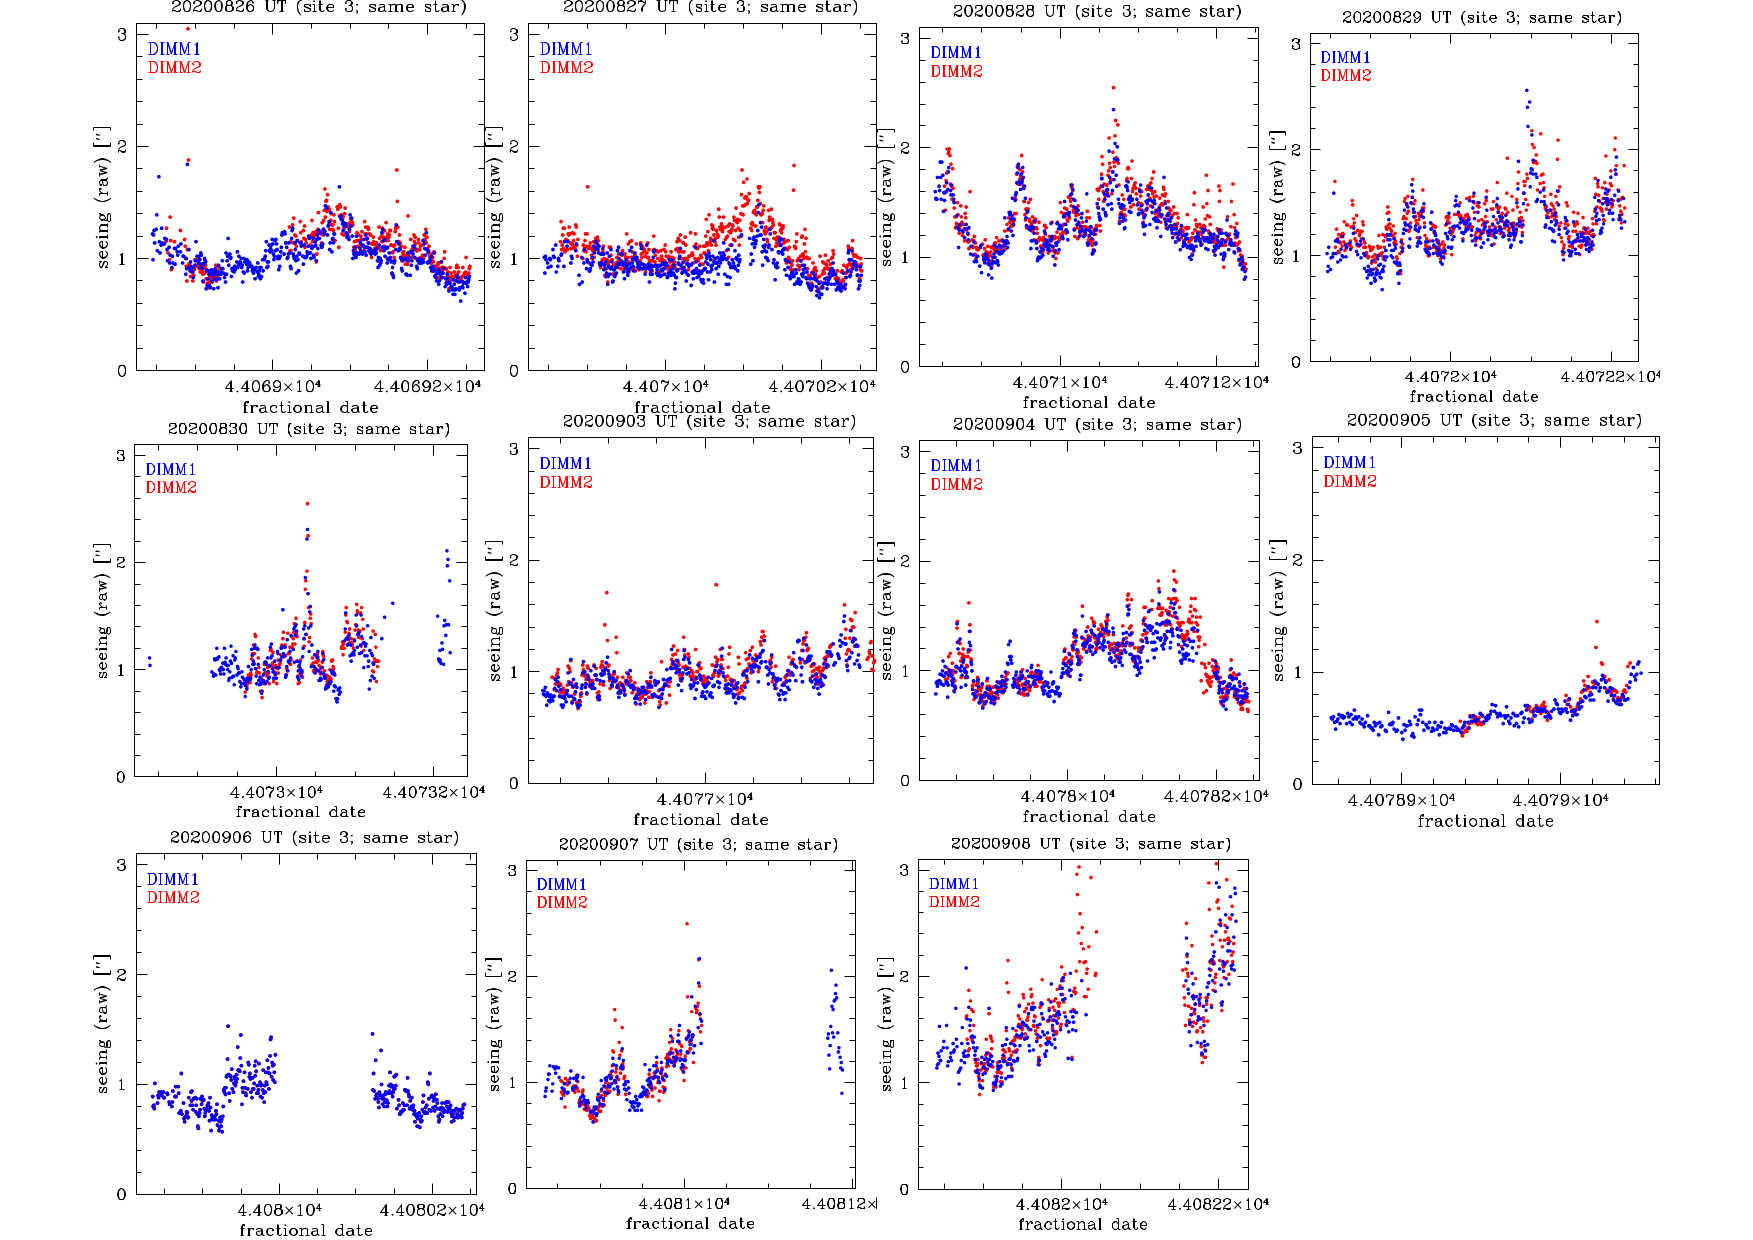
- dimm2_site3_same_20200909.jpg (224.1 KB) - added by stevenj 4 years ago.
- DIMM2_map.jpg (205.1 KB) - added by stevenj 4 years ago.
- DIMM2_map_2020_10_14_lo.jpg (205.1 KB) - added by stevenj 4 years ago.
- dimm1.jpg (182.9 KB) - added by syed 4 years ago.
- CenterStar.jpg (205.5 KB) - added by justenp 3 years ago.
- HandCtrlOptions.jpg (202.5 KB) - added by justenp 3 years ago.
- LevelNorth.jpg (207.9 KB) - added by justenp 3 years ago.
- Pick2Star.jpg (202.1 KB) - added by justenp 3 years ago.
- PressMode.jpg (205.6 KB) - added by justenp 3 years ago.
- SelectStar.jpg (203.2 KB) - added by justenp 3 years ago.
- SlewingStar.jpg (197.0 KB) - added by justenp 3 years ago.
- SpeedFast.jpg (204.2 KB) - added by justenp 3 years ago.
- SpeedSlow1.jpg (208.0 KB) - added by justenp 3 years ago.
- SpeedSlow2.jpg (206.3 KB) - added by justenp 3 years ago.
- TelBase.jpg (203.8 KB) - added by justenp 3 years ago.